Graphics Programs Reference
In-Depth Information
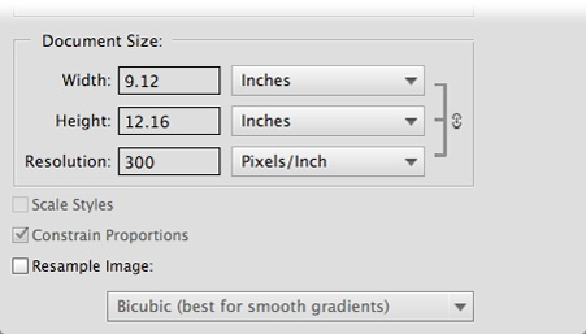
Figure 3-23. Crop your image to the shape you want (see page 89), and then use this sec-
tion of the Image Size dialog box to set its size for printing.
3.
Check the physical size of the photo
.
In the Document Size area, look at the Width and Height numbers. Are they what you
want? If so, you're all done, so click OK. If they're not what you want, continue with
the next step.
4.
If the size numbers aren't right, resize the photo
.
If the proportions aren't what you want, click Cancel, crop the photo (
Cropping Pic-
age using this dialog box.)
Once you've cropped the image and opened the dialog box again, turn on the Res-
ample Image checkbox and, if you're making the photo
larger
, choose Bicubic
Smoother from the drop-down menu at the bottom of the dialog box; if you're making
the photo
smaller
, choose Bicubic Sharper instead. (These settings are Adobe's re-
commendation, but you may find that you prefer one of the other resampling choices.)
Be sure to read the next section to understand how you're affecting the photo when
you do this.