Graphics Programs Reference
In-Depth Information
12.
Click the
Mapping
tab on the PropertyManager. The options available on this
tab are similar to that available on the
Mapping
tab of the texture PropertyMan-
ager.
13.
Set the
Mapping
type to
Label
.
14.
In the
Size/Orientation
section, change the
Rotation
value to
90
degrees.
15.
Set the
Width
value to 50.
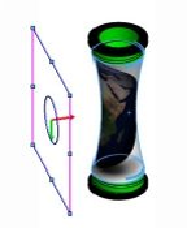
16.
Use the Horizontal Location and Vertical Location draggers to position the
decal properly.
17.
Click the
Illumination
tab and check the
Use underlying appearance
option.
18.
Click the
Image
tab on the PropertyManager.
19.
Under the
Mask Image
section, select the
Selective color mask
option.
20.
Click the
Pick color
icon.
21.
Go to the
Decal Preview
section and select the white color from the preview
image. The color is displayed in the
Selected colors
section and removed from
the decal. You can remove it from the
Selected colors
section by selecting and
clicking the
Remove color
button.
22.
Click
OK
on the PropertyManager.