Graphics Programs Reference
In-Depth Information
Tutorial 8 (Rendering using PhotoView 360)
PhotoView 360 is a SolidWorks Add-In, which allows you to create photo-realistic images.
1.
Open the Tutorial 8 file.
2.
On the Quick Access Toolbar, click
Options > Add-Ins
.
3.
On the
Add-Ins
dialog, check the
PhotoView 360
option and click
OK
(or)
click the
PhotoView 360
icon on the
SOLIDWORKS Add-Ins
tab of the
CommandManager. The
Render Tools
tab is added to the CommandManager.
4.
On the CommandManager, click
Render Tools > Edit Appearance
.
5.
On the Task pane, select
Appearances > Metal > Aluminum
, and select
pol-
ished Aluminum
from the browser.
6.
On the PropertyManager, under the
Color
section, click in the
Dominant Col-
or
box and select the light grey color from the
Color
dialog. Click
OK
.
7.
Click in the
Secondary Color
box and select white from the
Color
dialog.
Click
OK
.
8.
Click
OK
on the PropertyManager.
9.
On the CommandManager, click
Render Tools > Edit Scene
.
10.
On the Task pane, select
Scenes > Presentation Scenes
, and select
Kitchen
Background
from the browser.
11.
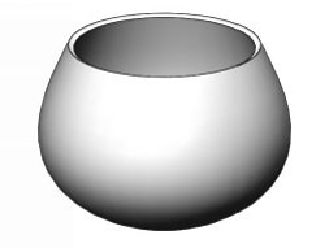
Rotate, zoom, and pan the model to position it, as shown.