Hardware Reference
In-Depth Information
5.
The
~
character here is a shorter way of saying
/home/pi
—your home
directory path.
6.
Add your
alias
commands, one per line, then press
Ctrl
+
X
to exit and
select
y
when prompted to save the modified buffer, then press the
Enter
key
to confirm the filename to write to.
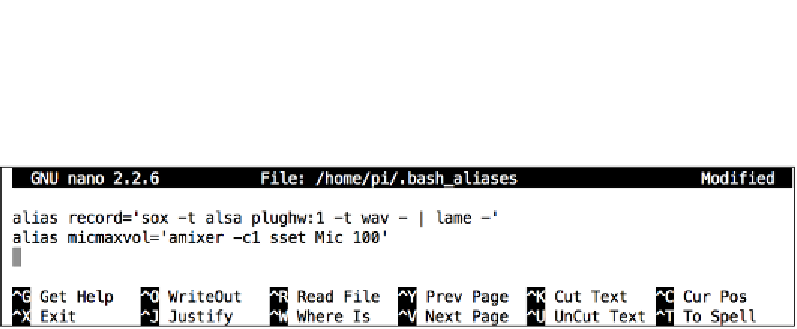
Adding two aliases to ~/.bash_aliases
Keep your recordings running safely
with tmux
So you're logged into the Pi over the Wi-Fi and have started the recording. Just as
things start to get interesting, there's a dip in the network connectivity, and your
SSH connection drops. Later, you retrieve the Pi only to discover that the recording
stopped when your SSH session got cut.
Meet
tmux
, a terminal multiplexer or virtual console application that makes it
possible to run commands in a protected session from which you can detach,
on purpose or by accident, and then attach to again without interrupting the
applications running inside the session.
1.
Let's install it using the following command:
pi@raspberrypi ~ $ sudo apt-get install tmux
2.
Now we're going to start a new
tmux
session using the following command:
pi@raspberrypi ~ $ tmux
Notice the green status line across the bottom of the screen. It tells us that
we are inside the first session
[0]
and we're looking at the first window
0:
running the
bash
command—our login shell.
3.
To demonstrate the basic capabilities of
tmux
, let's get a recording going
using that handy alias we defined previously:
pi@raspberrypi ~ $ record bgrec.mp3