Graphics Reference
In-Depth Information
Advanced animating ("morphing")
The Animation Engine (as we're about to use it) is really kind of a particle-morphing
engine. With only two keyframes (and a few parameter adjustments), you can
animate unlimited numbers of particles. If you use your imagination (for example,
maybe use expressions with audio levels), you could create automated animations
that will dazzle any psychedelic flashback imaginable as follows:
1.
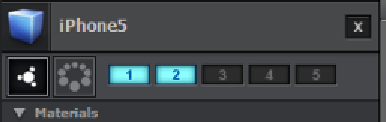
Firstly, you will need to get into your
Scene Setup
and put the iPhone
on
both
group 1 and group 2 (as shown in the following screenshot).
2.
Copy and paste the properties (using
Group Utilities
) from group 1 to
group 2.
3. On group 2, in
Particle Look
, you'll see
Particle Rotation
. In the
Y Rotation
Particle
, enter the value
180
.
4.
Now you have one group of iPhones facing outwards and one group
facing inwards.
They should be on top of each other, so it will really look like there are eight iPhones
that are double sided. Don't worry, that will get fixed in the next step. What we've
just done is created an original and a target. One group is how the iPhones will start,
and the other group is what they'll morph into. They'll morph by changing whatever
parameter has been changed as if it were keyframed and tweened on a per object basis.
Here we go…
1. In the
Animation Engine
twirly, tick the box that says
Enable
. You should
see group 2 disappear. We're going to reverse things a bit though.
2. We want to start with the Apple logo facing outwards and make the iPhones
spin around one by one. So, on the drop down that says
Start Group
(under
Group Selection
), select group 2, and under
Finish Group
, select group 1.
Now you should see the phones flip around.
3.
Here's where things get fun. Under
Animation Type
, select
Shape Order
.
This will now make the phones flip around one by one in a clockwise order.
4.
Move your time slider to
4:00
and set a keyframe on the
Animation
parameter.