Game Development Reference
In-Depth Information
artist to map a skin onto the finished model. The skin is called a
UV map
(UV
refers to the x and y coordinates of the model), also called a
diffuse map
. Other
maps can be layered on the UV or diffuse map to add additional dimensional
texture (
bump maps
and
normal maps
) and
specular values
, thus creating skins
that are lifelike and realistic.
A program called BodyPaint 3D can be used to create skins for characters,
props, and backgrounds with CINEMA 4D, Maya, and 3ds Max.
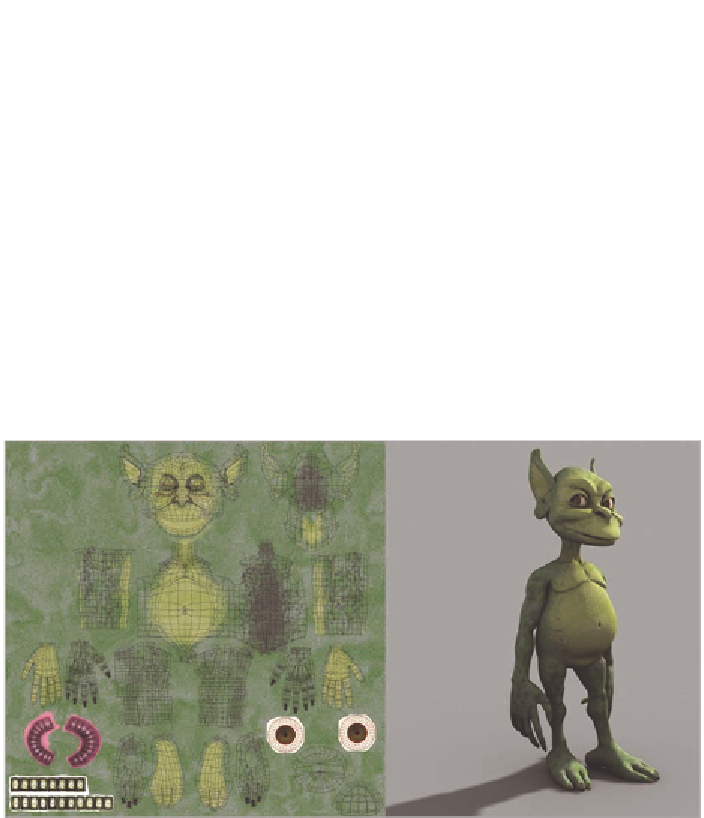
Figure 5.14 shows a model of a goblin character named Goblinko, created by
artist Richard Sternberg. After sketching the figure, including front and side
views, he imported those drawings as image plane into 3ds Max. The image on
the left, an exploded view of the goblin, shows what that map looks like before
it's attached to the mesh. Sternberg then used the program to generate the fin-
ished model on the right.
FiGuRe 5.14
When creating a texture map for a 3D model, a program like Photoshop
allows you to paint all kinds of details that are then applied as the skin.
As a quick review, the
mesh
is another word for your 3D model; the terms are
used interchangeably. There are different methods to apply a skin of texture and
color to that mesh (model):
normal map
This method for painting the map for the model uses a fake light-
ing technique of bumps and dents that add more detail to the figure without
increasing the number of polygons.
Bump map
This is a form of normal mapping, where wrinkles or bumps are
made to appear on the skin you're painting for the 3D model by adjusting the