Graphics Programs Reference
In-Depth Information
Figure 18.59
The customized wall tag
9.
Back in the project, you're ready to tag the wall. Once you insert the tag into the project
file, Revit will automatically begin the tagging command. However, the other way to
begin tagging is to choose Tag By Category from the Annotate tab. Select the wall to
which you have already given a value of 45 for the STC. You'll see the wall type and STC
rating populate within the tag (Figure 18.60).
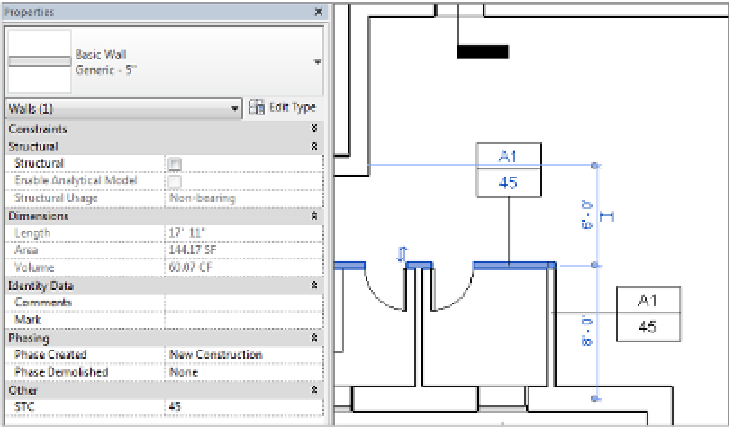
Figure 18.60
he shared
parameter now
shows up in the
tag within
the project.
Once you've stepped through this workflow a few times, it will quickly become familiar and
you'll be able to add custom parameters to projects and tag them without a second thought.
One thing to keep in mind while you're doing all this, however, is that once you have added
a shared parameter to your project, you will not be able to change any of the properties of the
parameter itself. If you set the parameter type to Integer but you really wanted Number, you'll
need to delete the parameter and start over. Also, when working with a team, remember that
shared parameters work much like keynotes with their external .txt files. If you are sharing
the project file with the idea that it will be edited by another team, be sure to include the shared
parameter file.