Graphics Programs Reference
In-Depth Information
8.
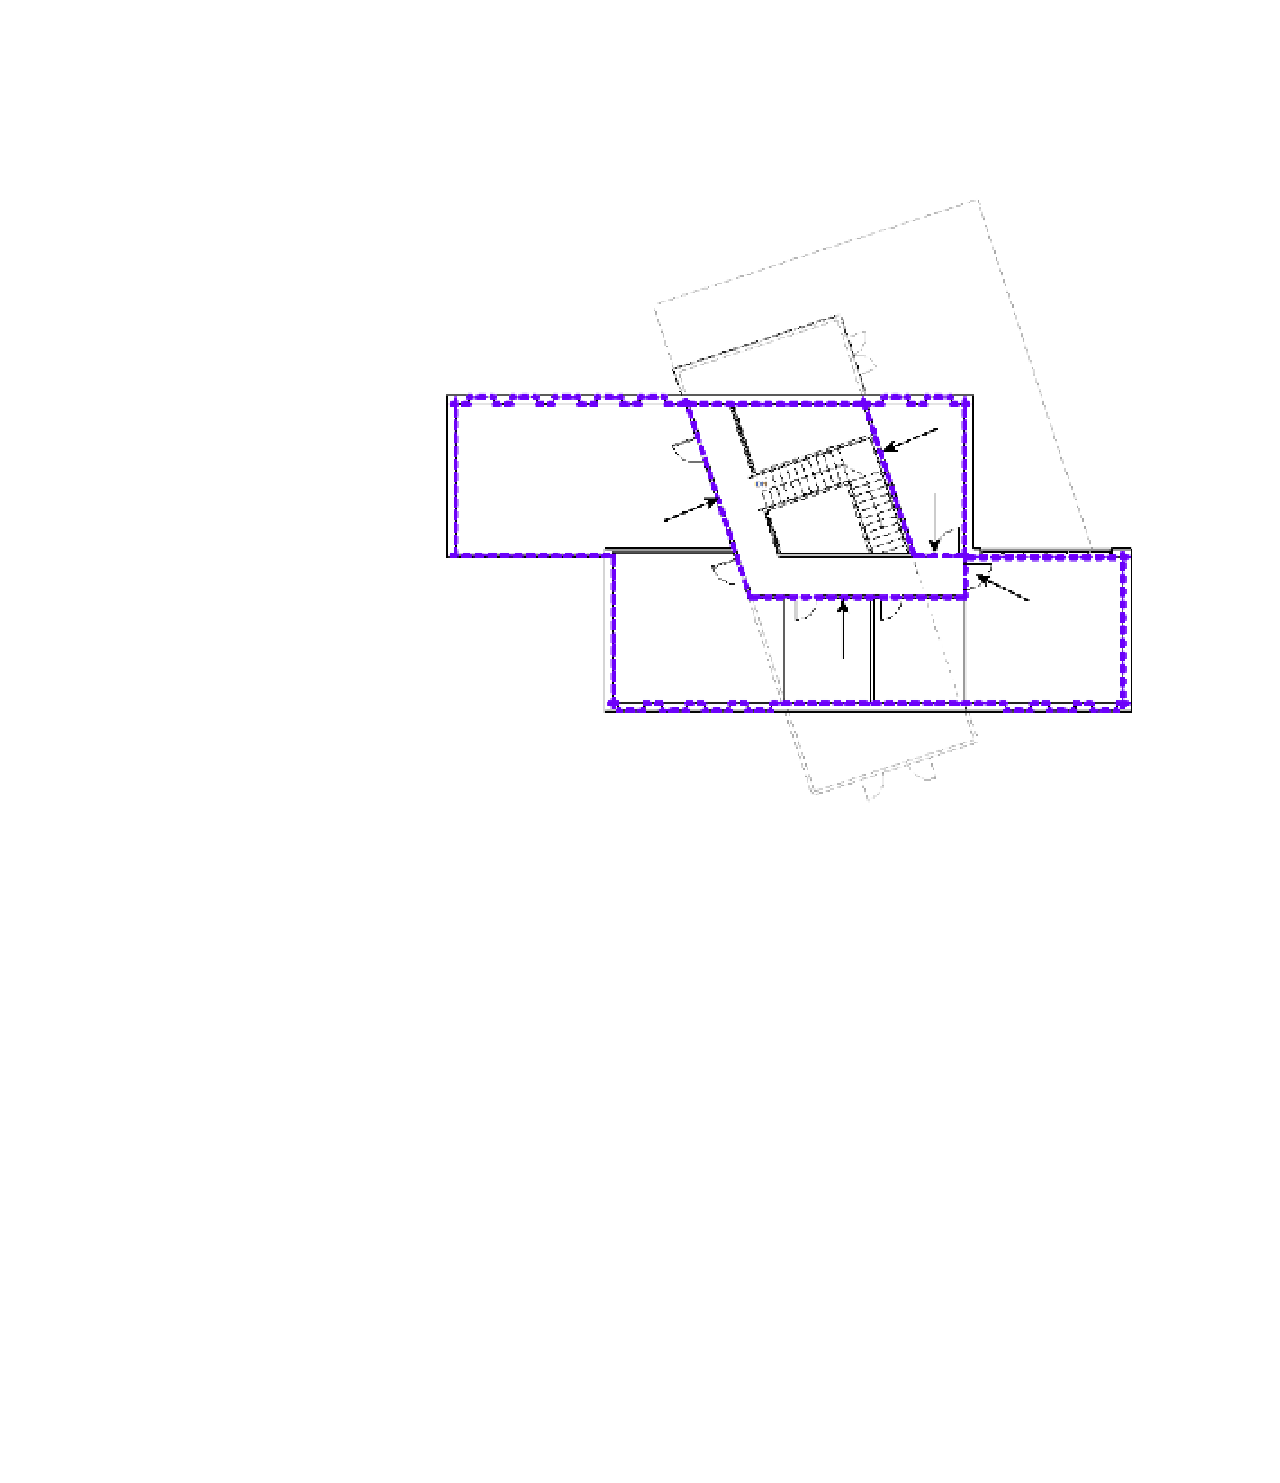
Activate the Level 2 area plan for Usable Area, and using the same method as in Level 1,
add area boundaries to the interior walls indicated in Figure 17.8. You will need to use the
Trim tool to adjust the line for the wall at the end of the corridor.
Figure 17.8
Place additional area
boundaries on level
2 as shown here.
adding area Objects
Like room elements, areas need a closed boundary in order to be placed, and they have
properties to which you can add attributes that are “taggable.” You can have any number of
areas visible in an area plan, but unlike rooms, areas can be seen and tagged only in area plans.
In this section's exercise, you will place area objects within the boundaries you created in the
previous exercise:
1.
Back on the Room & Area panel on the Architecture tab, choose the Area tool.
The Area tool places an area in a manner similar to placing a room, and it gives you a
bound area with a large X in it (Figure 17.9). The area of the space bound by the purple
boundary lines will be reported as part of the area tag.
2.
Place areas in each of the zones defined by the boundary lines in the Level 1 floor plan
for Usable Area. To modify the names of the areas, you can select the area object and then
modify the name in the Properties palette, or you can select the area tag, click the name,
and then type the new value. Change the names of the areas to
OFFICES
,
LOBBY
, and
SERVICES
, as shown in Figure 17.10.