Graphics Programs Reference
In-Depth Information
5.
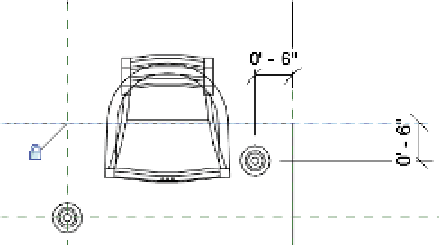
From the Modify tab in the ribbon, click the Align tool. As shown in Figure 14.48, click
the Back reference plane (1) and then the reference within the chair (2). Finally, click the
padlock icon to establish a constraint (3).
Figure 14.48
Using the align tool
1
2
3
6.
Add an aligned dimension from the Right reference plane to the center reference of the
chair. Set the value to
1
'-
8
” (
500
mm), and click the padlock to establish the dimension as
a constraint.
7.
Select the chair, and then from the Modify tab in the ribbon, click the Array tool. In the
Options bar, choose the Group And Associate option and the Move To: End radio button.
8.
Click once near the chair and then click a second time 2'-8” (800 mm) to the left. Press the
Enter key to accept the number of entities in the array.
9.
Use the Align tool to constrain the arrayed chair to the Back reference plane, add an
aligned dimension, and then lock the dimension—similar to the previous steps. The plan
view should look like the image in Figure 14.49.
10.
Select one of the arrayed chairs, and you will again see a line connecting the arrayed
objects displaying the number 2. Click this line and then choose <Add parameter…>
from the Label drop-down list in the Options bar. Create a new parameter named
Chair
Array
. Click OK to close any open dialog boxes.