Graphics Programs Reference
In-Depth Information
4.
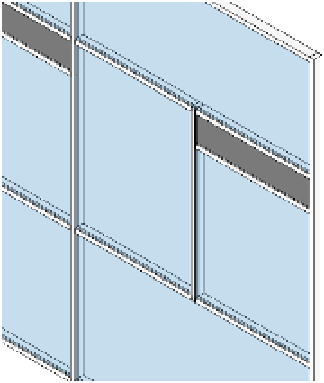
Activate the Mullion tool and place mullions on the division between the two center
panels, as shown in Figure 12.41.
Figure 12.41
Mullions are
applied to the
segment added in
the center panels.
5.
Press the Esc key or click Modify. Select and delete the horizontal mullion between the
two left panels (this step is optional).
6.
Similar to the process of adding grid segments, select the horizontal curtain grid below
the narrow band and click the Add/Remove Segments button in the ribbon. Click the
segment in the left-center panel.
If you did not delete the mullion in step 5, a warning will appear prompting you to delete
the mullion segment. The result should look like the wall shown in Figure 12.42.
Figure 12.42
a segment was
removed from
the left panel
to complete
the customized
design.
Placing Doors in Curtain Walls
In the next exercise of this topic, you will swap one of the curtain panels for a door panel. Door
families for curtain walls can be found in the Doors folder of the Revit default library, but they