Graphics Programs Reference
In-Depth Information
3.
With all the glazing panels selected along the horizontal grid, go to the Type Selector and
find the type named Solid under the family system panel (note that the Glazing panel
type is in the same family as the Solid panel).
Customizing Curtain Grid Segments
In the last part of this exercise, you will practice the techniques for adding or removing
segments of curtain grids in order to refine your curtain wall design.
Understanding the Curtain “Grid”
one important fact to remember when working with curtain grids is that they are always implied
across the extent of the curtain wall. When we say they are implied, we mean they are not neces-
sarily expressed on all panel segments. in other words, although a curtain grid is always expressed
from one end of the wall to the other, you can decide if the grid divides every panel it crosses.
To become more familiar with this technique, you will add a curtain grid to the midpoint of
the right-center panel and delete the division between the two panels to the left of the added
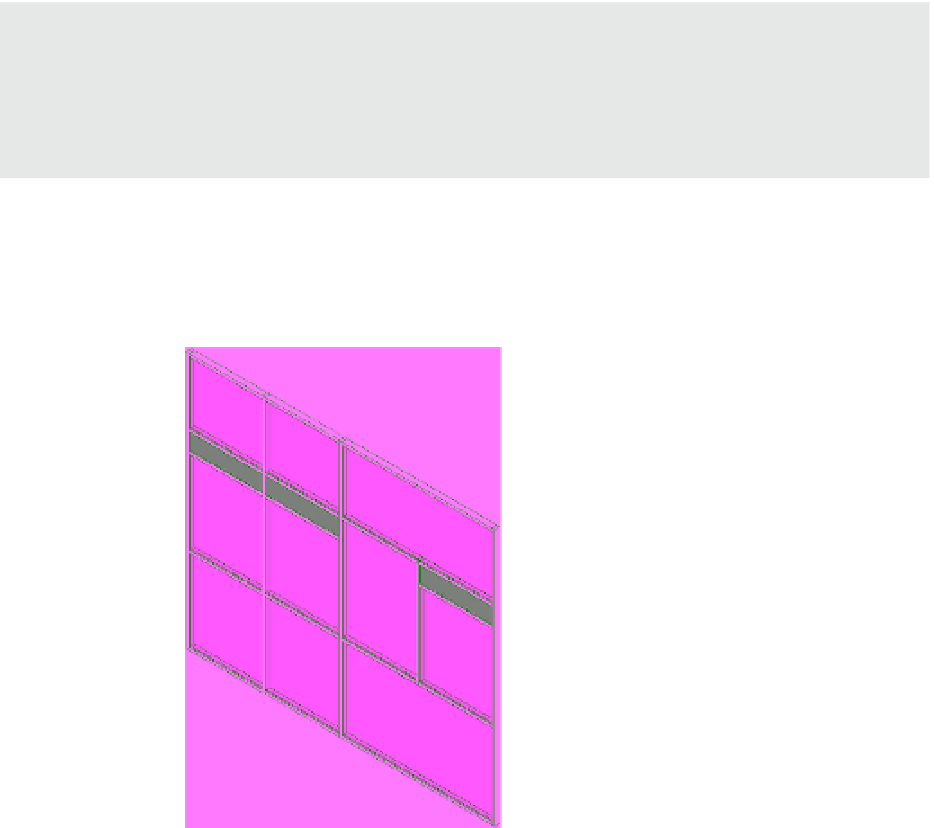
grid, as shown in Figure 12.38.
Figure 12.38
individual grid
lines are added or
deleted to further
customize the
design.
Follow these steps:
1.
Begin by activating the Curtain Grid tool from the Architecture tab. In the Placement
panel at the right end of the ribbon, click the One Segment button. Hover your mouse
pointer over the bottom edge of the right-center panel, snapping to the midpoint of the
panel (Figure 12.39).