Graphics Programs Reference
In-Depth Information
Once you see the camera, you can select and move it around your project. Doing so allows
you to move your camera closer or farther away. You can also select the clipping planes of your
camera and edit the front and back planes of your camera's view.
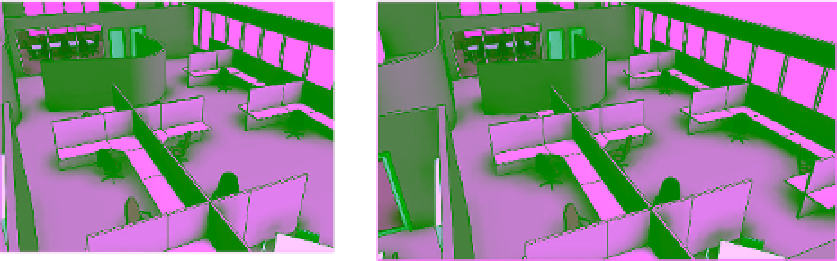
The aspect ratio of your camera view is also important. For example, a television ratio of 4:3
seems far less expansive and dramatic than a 16:9 wide-screen ratio. Figure 11.49 illustrates this;
the image on the left is 4:3 and the image on the right is 16:9. The result is that the view on the
left seems too tight and constrained, whereas the view on the right is far more natural.
Figure 11.49
aspect ratio
comparison
To change the aspect ratio, select the crop region in the camera view and then click the Size
Crop command in the contextual tab of the ribbon. In the resulting dialog box, you can change
the aspect proportionally or non-proportionally (Figure 11.50). Keep in mind that this setting
doesn't zoom your camera forward and backward; it simply changes the relative height and
width of the aperture.
Figure 11.50
The Crop Region size
dialog box
You can also modify the camera position and angle on the fly using the SteeringWheels
®
(similar to other Autodesk products). Simply activate the Navigation Wheel (Figure 11.51)
located on the right side of the view window or press Shift+W on the keyboard. You'll be able
to zoom, pan, and orbit as well as control other view features using the Navigation Wheel.
This tool can take some getting used to because it will “follow” your mouse pointer across
the screen—it's not anchored at the bottom corner as the image might suggest. This is helpful
because it will give you a dynamic menu to change and modify your view, but don't forget to
turn it off before you start modifying geometry. Selecting the same button again will hide the
tool until you need it again.