Graphics Programs Reference
In-Depth Information
Working with the Section Box
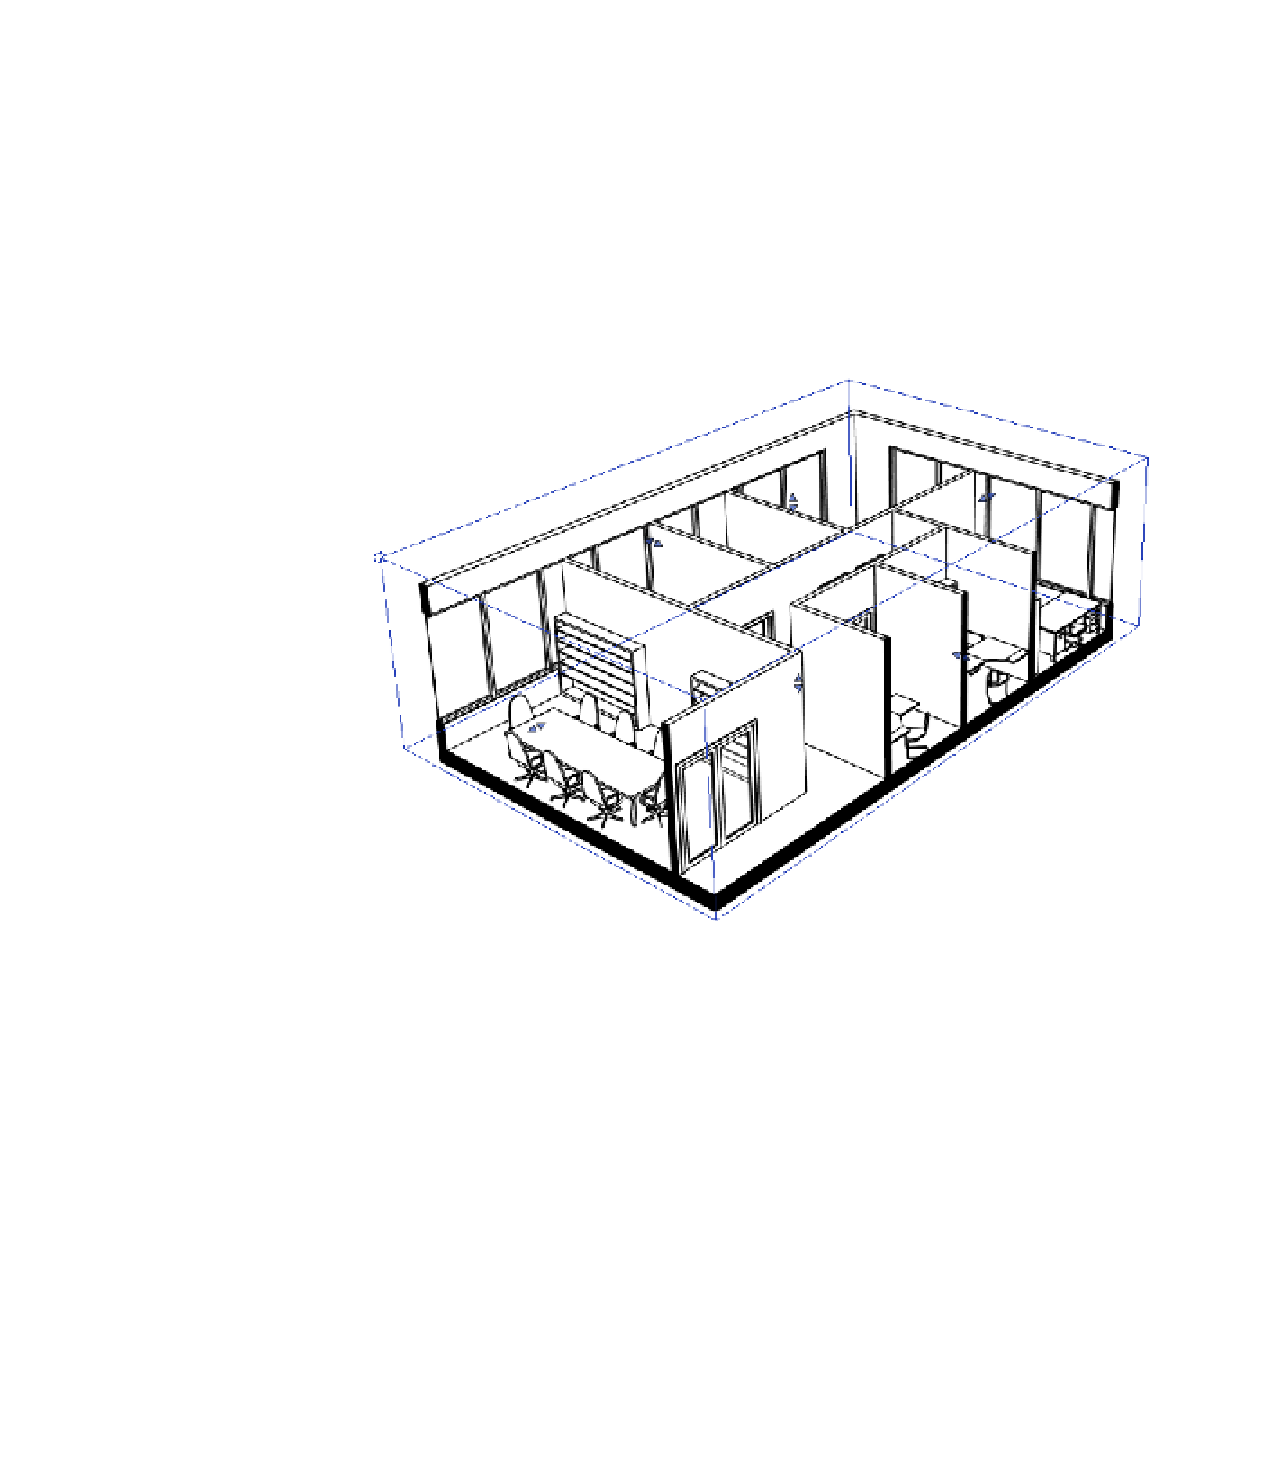
Before we get into the rendering process, let's discuss the section box. By selecting the Section
Box option from the Properties palette for the view, you create a rectilinear matrix around your
project that may be pushed and pulled to isolate a portion of your project within the view.
In Figure 11.27, the section box has been pulled to isolate a portion of the project. This
technique is helpful for isolating a smaller portion of a larger project. But a word of warning: Be
careful toggling the section box off and on. The extents of the section box will reset and you'll
have to pull them back into place. Very frustrating! If you want to see the whole project and the
sectional view, it's best to use two separate views.
Figure 11.27
Pulling the section box
to isolate a portion of
the project
After you activate a section box in a 3D view and you configure the box to intersect some
model elements, you have another graphic tool to aid in your visualization. If the Detail Level
of the view is set to Coarse, model elements that are intersected by the section box will display
a color and fill override that can be customized as you see fit. From the Properties palette for
the view, select Edit Type. Upon opening the Type properties, you'll notice that there's a Coarse
Poche Material setting, which determines the color and fill pattern of the poché.
The poché can be seen in all display types (Wireframe through Realistic), but it is displayed
only in a view that is set to the Coarse level of detail. We recommend that you set the default
color to black.
Here's why you would want the poché color to be black. As shown in Figure 11.28, the regions
between host elements (like the walls and floors) are shown as discrete geometries. Notice that
you can see black lines dividing the geometry where walls meet floors, and so on.