Graphics Programs Reference
In-Depth Information
So, when do you need to create more than the phases shown by default? As one example,
think of a staged construction project that will happen in two new phases. In this scenario, you
are designing with a start time for the building shell followed by another phase for interiors,
allowing the owner to split funding for the project into two budgets. In phase one, the building
core and shell are built. In the second phase, interior construction occurs. Your first phase
is labeled Shell and Core. Your other phase is labeled Interiors. This phasing also gives a
contractor who is familiar with Revit the ability to use the model to see what needs to be built
and when. Depending on how your model is created, the contractor can even do cost estimates
by phase.
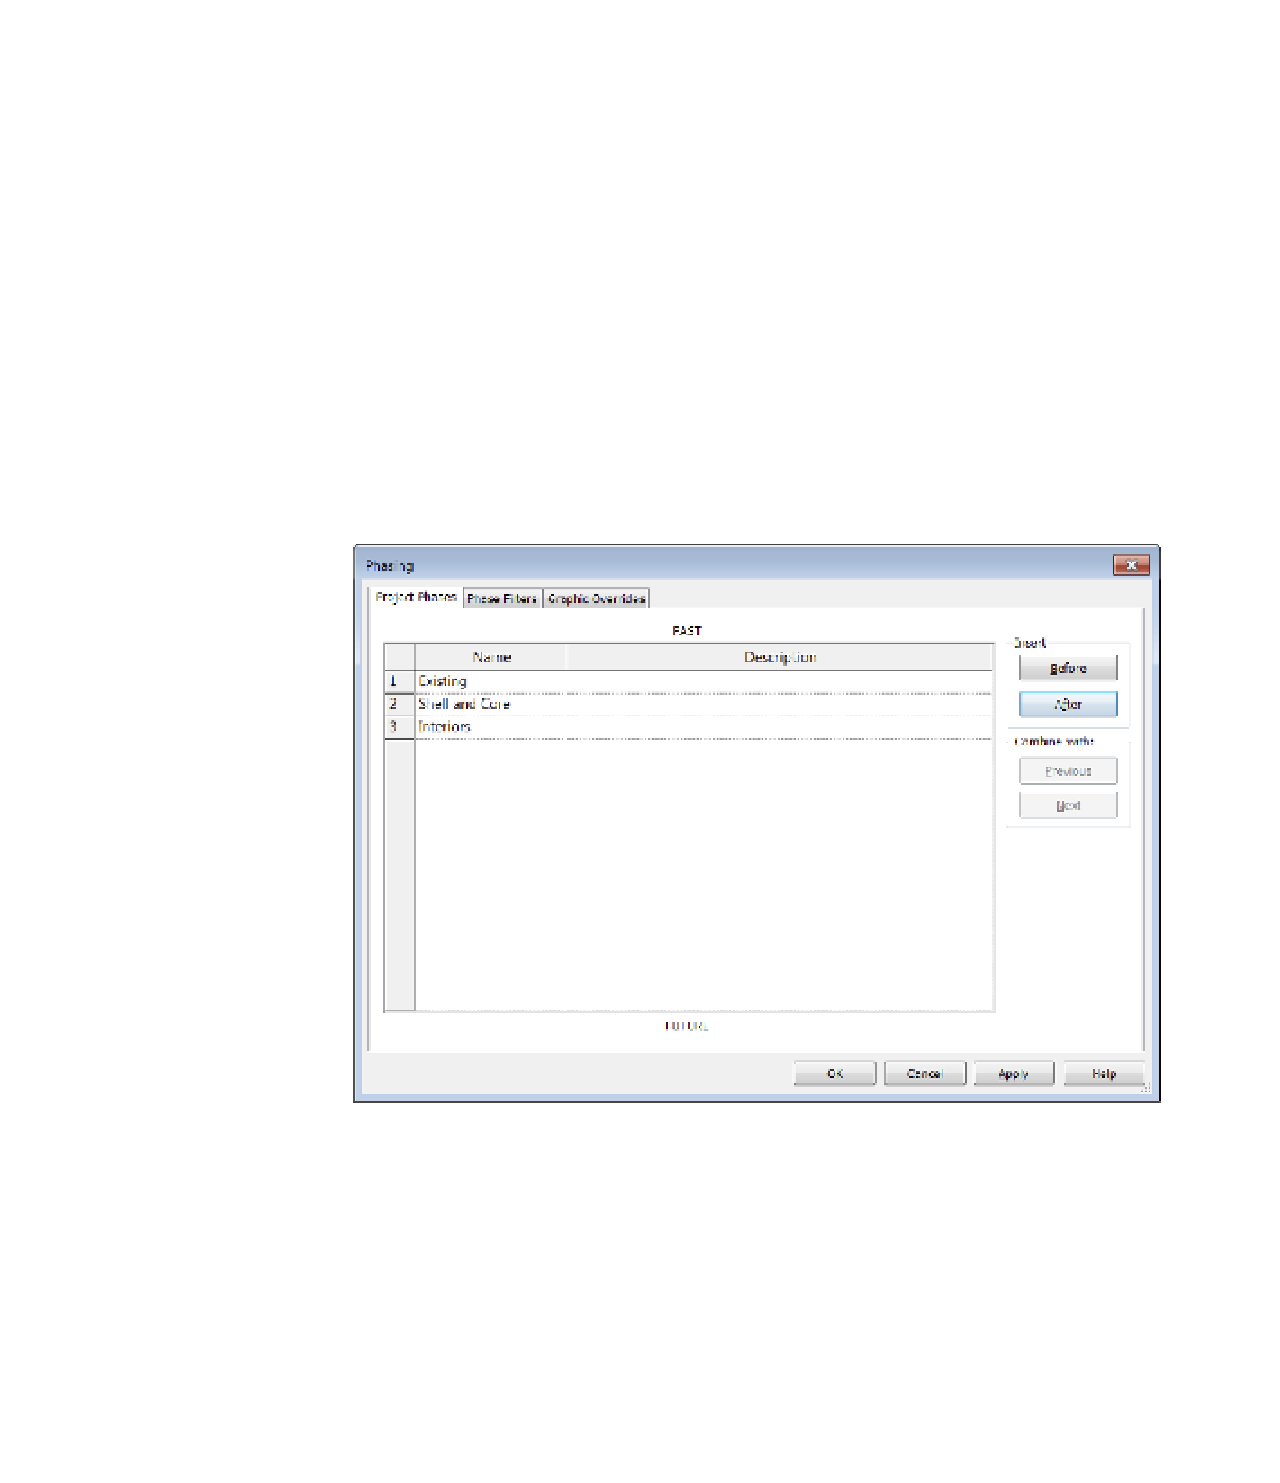
In the Project Phases tab of the Phasing dialog box, create the two phases as we just described
(Figure 10.9). You can simply rename the New Construction phase
Shell and Core
. Click the
Insert After button to create an additional project phase and then rename it
Interiors
. We'll use
them in a sample exercise in a moment. When you're creating phases, you might notice there's no
Delete button. You can't delete a phase once you've added it because you don't want to delete any
geometry placed on a phase. Should your planning process change and you want to eliminate a
phase, you can merge two phases using either of the Combine With buttons on the right.
Figure 10.9
Creating additional
project phases
Click OK to accept the changes and close the Phasing dialog box, and then activate the Level
1 floor plan. Once you've created these additional project phases, pick any project geometry and
look at its instance parameters. You'll notice in the Properties palette that it can be assigned to
any one of these three phases, as shown in Figure 10.10.