Graphics Programs Reference
In-Depth Information
Pay close attention to this option when integrating 2D CAD data with an existing Revit
model—sometimes linked or imported CAD data may not appear at all until you set the option
to Foreground because of floors or ceilings obscuring the 2D data.
Visibility of Layers/Levels
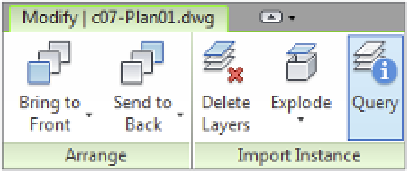
The layers or levels within a linked or imported CAD file can be
accessed in two ways, the easiest of which is the Query tool. First, select a linked or imported
CAD file, from the contextual tab in the ribbon select the Query tool, and then pick an object in
the CAD file.
You will see the Import Instance Query dialog box (Figure 7.4). Using this tool, you can hide the
layer or level by clicking the Hide In View button. The Query tool will remain active even after
you click any of the command buttons in the Import Instance Query dialog box, and you must
press the Esc key or click the Modify button to end the command.
F igur e 7. 4
Querying objects
within a linked
CaD ile
The second way to make layers or levels in imported or linked CAD files invisible is to use the
Visibility/Graphic Overrides dialog box by switching to the View tab and selecting Visibility/
Graphics from the Graphics panel. Once the dialog box opens, select the Imported Categories
tab, as shown in Figure 7.5. Only the inserted CAD files that are visible in the active view will
be listed in this tab. Expand any listed file to expose the layers/levels within that file, and use
the check boxes to customize visibility of the link within the current view. This method is the
only way to restore visibility of layers/levels that were hidden with the Query tool.