Java Reference
In-Depth Information
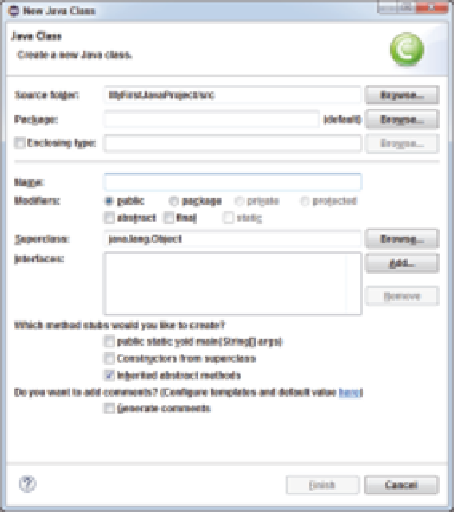
figure 3-14
10.
Enter
MyFirstApplication
as the class name. Make sure the source folder refers to the correct proj-
ect and the package refers to the correct package. You can leave the Modifier set to Public and the
Superclass set to
java.lang.Object
. None of the checkboxes need to be checked. You will learn
much more about these concepts as you continue through the topic. Press Finish to create your class.
11.
You should see some code already written in the Code Editor. Also, the view should now include the
tab
MyFirstApplication.java
, the source file for your first class. If some of your checkboxes were
checked, you might have more code automatically provided than what is shown in Figure 3-15.
12.
Below the
package myPackage;
line, type
/**
and press Enter. You should see a blue comment
block appear with space for you to enter comments about your class. It may include the
@author
information if your computer has some user information saved. You can delete or edit this if you
like. Add a comment describing your class after one of the
*
symbols. It should look something like
this:
/**
* This is a simple Java application.
* It prints a short statement to the standard output.
*/
13.
Below this comment, you will see public class
MyFirstApplication {
, then a blank line and
}
. In
between the two curly brackets, where the blank line is, you can add the code for your class. This is
a very small program, so you only need a
main
method. Add it so the class looks like the following:
Search WWH ::

Custom Search