Java Reference
In-Depth Information
3.
Open Eclipse and create
a new Java project, e.g.,
SOAPWithJava
.
4.
Drag the extracted
lib
folder
to your Eclipse project, i.e., to
the
SOAPWithJava
entry in the
package explorer.
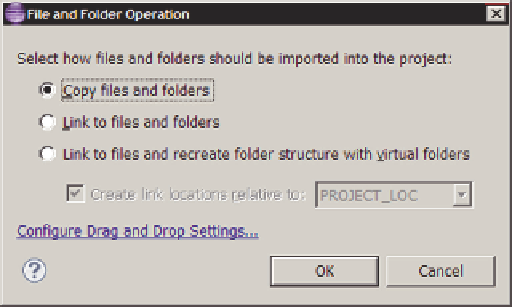
5.
Eclipse will ask you how it
should import your files. You
should copy them in the Eclipse
project to keep things neatly
in one place, as shown in
Figure 10-5.
6.
The package explorer should now list a
lib
folder under the
SOAPWithJava
project.
It's best to rename this folder
jaxws
(right‐
click, select Refactor and then Rename). Do
this before you move on to the next step.
7.
You now need to add all the JAR files
in the
jaxws
folder to the build path, so
Eclipse and Java know that you want to use
the classes contained in these files in your
project. You do so by selecting all JAR files
in
jaxws
and in the
plugins
subdirectory,
right‐clicking, and then selecting Add to
Build Path under Build Path, as shown in
Figure 10-6.
8.
The JAR files will now show up under
“Referenced Libraries” in the package
explorer.
9.
Finally, keep the extracted ZIP file around,
as you'll need to use the executables pro-
vided in the
bin
folder.
You're now ready to move on with the implementa-
tion of the actual client.
figure 10-5
Accessing SOAp Services with JAX‐WS
Without WSDL
In this section, you first take a look at how to access web services without using the WSDL
descriptor file.
figure 10-6

Search WWH ::

Custom Search