Game Development Reference
In-Depth Information
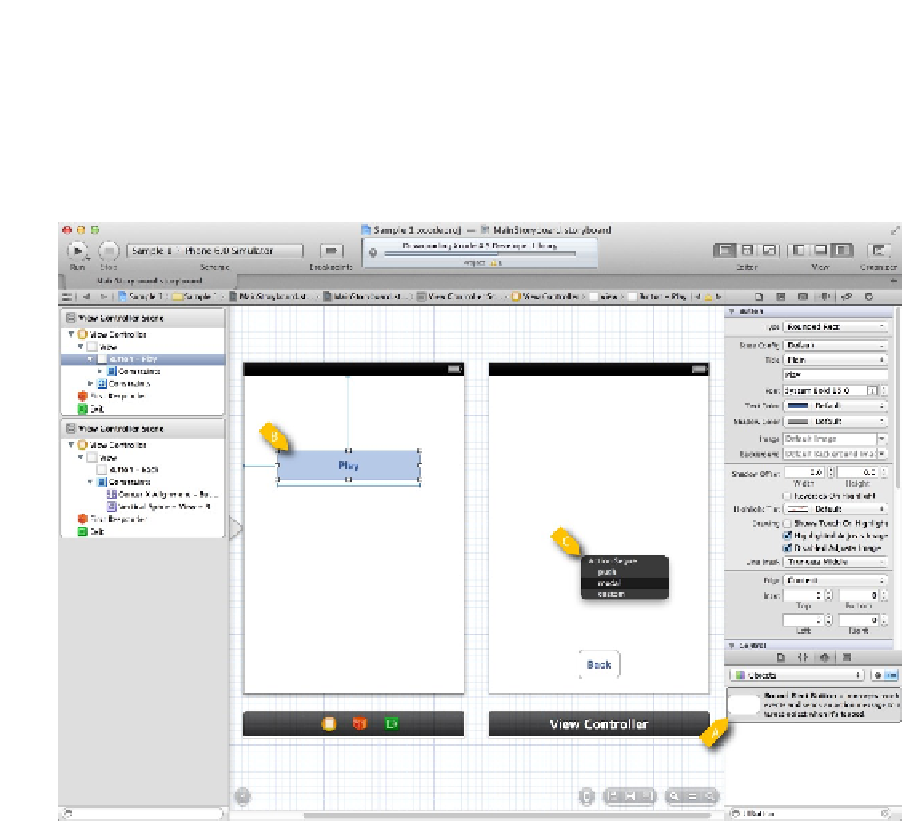
Simple Navigation
We now want to create some buttons that enable us to navigate from one view to the other. The first
step is to add the buttons, and the second is to configure the navigation. Figure
1-7
shows these
views being wired up for navigation.
Figure 1-7.
Storyboard with navigation
In Figure
1-7
, we see that we have dragged a
UIButton
from the library item A onto each of the
views. We gave the
UIButton
on the left the label Play, and the
UIButton
on the right the label Back.
To make the Play button navigate to the view on the right, we right-drag from the Play button (item B)
to the view on the right and release at item C. When we do this, a context dialog pops up, allowing
us to select which type of transition we want. I selected Model. We can repeat the process for the
Back button: right-drag it to the view on the left and select the transition you want for the return trip.
You can run the application at this point and navigate between these two views. In order to make it a
game, though, we need to include the Rock, Paper, Scissors view and buttons.
Adding the Rock, Paper, Scissors View
To add the Rock, Paper, Scissors view, we need to include a class from the sample code in the
project you are building. The easiest way to do this is to open the sample project and drag the