Database Reference
In-Depth Information
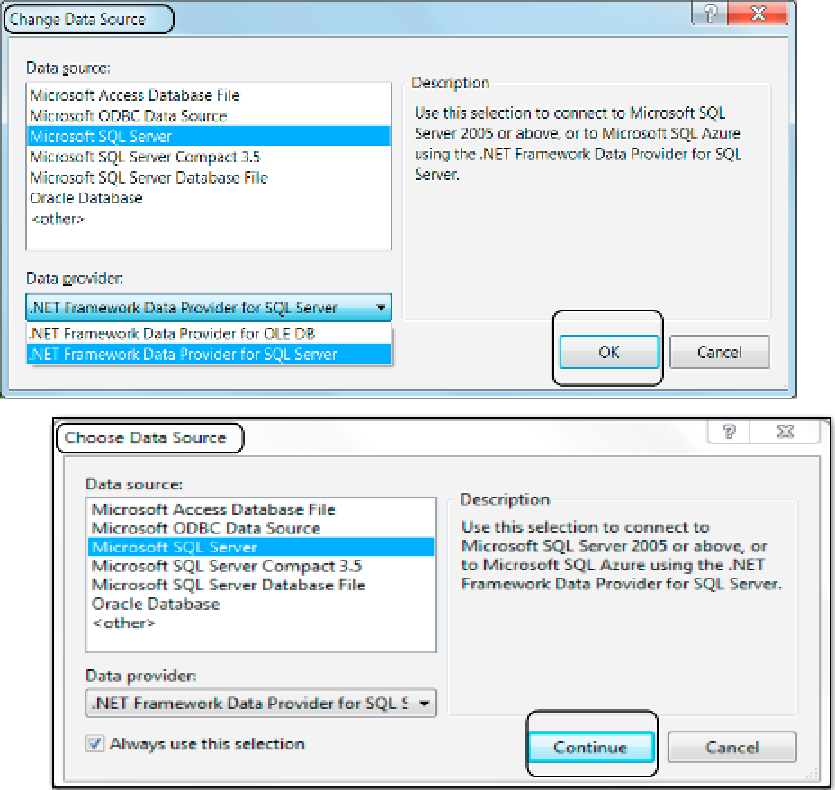
Figure 2-20.
Setting the connection to use SQL Server as the data source
Important:
Depending on a combination of things, visual Studio will sometimes display the Choose Data
Source window, shown at the bottom of Figure
2-20
, instead of the Add Connection window. Both windows
look almost identical, and we cannot be sure which will open on your computer. You can use either one to
select your data provider.
if the Choose Data Source window appears before the Add Connection window on your computer, just
select the Microsoft SQL Server data source and the .NET Framework Data Provider for the SQL Server data
provider; then click the Continue button, and the Add Connection window appears. Add the Microsoft SQL
Server (SQLClient) setting to the Data Source dropdown box, as shown in Figure
2-19
.
if the Add Connection window appears but the Microsoft SQL Server (SQL Client) setting is not in the Data
Source dropdown box, then click the Change button, and it will open the Change Data Source window, also
shown in Figure
2-20
.
4.
in the Add Connection dialog window (Figure
2-19
), set the server name to either the
name of your computer or the alias of (local) in the Server name dropdown box. if
you are using a SQL named instance, then you have to include that name as well (for
more information, search the web for “SQL Server named instances”).