Game Development Reference
In-Depth Information
So why do all this as a separate function? Couldn't it all be done
with the rest of the instructions on what to do when the user
clicks the mouse button? Well, it could if it wasn't for that pesky
yield statement. Yields are considered “coroutines” and coroutines
cannot be part of a function Update (since function Update is firing
every frame). By breaking this function out, though, we can play
with time and when to fire what based upon things like
yield
WaitForSeconds
. The reason for waiting 2 seconds in the first place
is to allow the player to place the EMP and then get back before it
goes off.
Step 17:
Save and return to Unity. Fix any syntax errors that might
pop up.
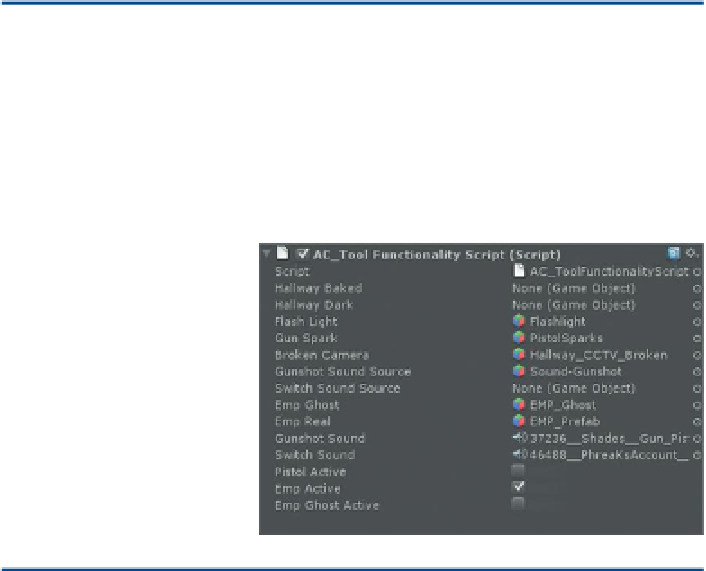
Step 18:
Populate the new variables for the script. Remember that
the script is attached to the Main Camera. Drag EMP_Ghost and EMP_
Prefab into their respective spots (drag them from the Project panel
(
Figure 15.27
). Make sure Pistol Active and Emp Ghost Active are both
unchecked to be inactive.
Figure 15.27
Populated AC Tool
Functionality Script.
Tips and Tricks
Notice that currently some of the variables are not populated. Namely,
the objects that are only available in the Hallway scene. While this might
not be as elegant as it could be, it's still alright. In the version of this
prefab that lives in the Hallway scene, these variables are populated so all
should be OK.
Step 19:
Play and test. Since EMP Active is turned on from the start, there
should be a ghosted version of the EMP floating around. As the player
moves, it will move in front of them. When the mouse button is clicked,
the ghosted version will be replaced by the real EMP that will fire its
detonator script (and sound) after two seconds.
Step 20:
Play again and walk up to any of the triggers set up in the scene
and notice how the ghost EMP ends up sticking to these invisible surfaces
(
Figure 15.28
).