Game Development Reference
In-Depth Information
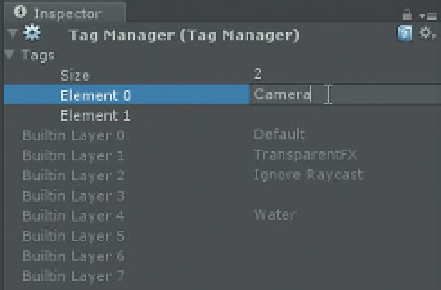
Figure 15.8
Defining new tags.
here, it's worthwhile to point out that custom tags can be created as well.
Just select Add Tag . . . from the Tag drop-down menu, and the Inspector will
appear like
Figure 15.8
where the user can define a new tag name.
So the power of this idea is that a script can look for objects with a matching
tag (say “Player”). So the main character can be called Fred at the beginning of
development, Aegis midway, and be Janine when it's finally ready to be built,
and as long as all three are tagged as Player, the script referencing it never
breaks throughout the development process.
Step 9:
In the Inspector panel, give First Person Controller a Player tag.
Step 10:
Make our camera searching script watch specifically for objects
whose tag is Player. If the ray strikes an object whose tag is “Player,” change
the LED to red (RGB value is 1,0,0):
function Update () {
var hit : RaycastHit;
if (Physics.Raycast (transform.position, transform
.forward, hit, 100)){
Debug.DrawLine (transform.position, hit.point,
Color.yellow);
if (hit.collider.gameObject.tag == “Player”){
renderer.material.color = Color (1,0,0);
}
}
}
Why?
This should look a little familiar. Instead of checking for name,
hit
.collider.gameObject.tag
is checking for the tag. If they match,
it takes the
renderer.material.color
of the object this script is
attached to (which is the LED) and changes the color values to R = 1,
G = 0, B = 0.
Step 11:
Save and return to Unity. Fix any syntax errors pointed out in the
Console.
Step 12:
Test. Walk through any part of the level and as the camera “sees”