Game Development Reference
In-Depth Information
In the first tutorial of this chapter we are going to write a script that allows
the CCTV cameras in the scene to become “smart.” They are going to really
be looking for intruders (actually just raycasting along the camera's line of
sight), and when the player does indeed come within the line of sight (collides
with the ray), the camera's LED will begin to flash and a countdown will begin
unless the player destroys the camera.
Prefabs versus Prefab Connections
If you are working from the imported assets (brought in from Chapter 13),
the CCTV cameras are already placed within the scene and roughly oriented
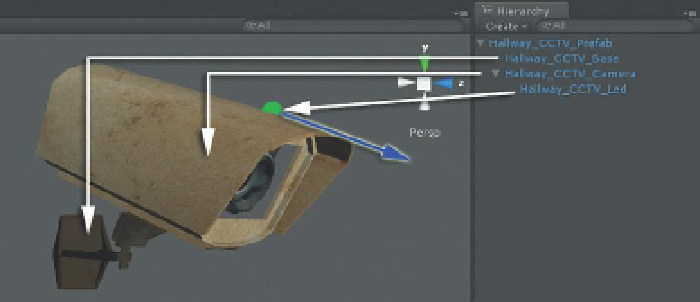
for reasonable coverage. Take a look at
Figure 15.1
to see how the camera is
arranged.
The camera is organized to allow for quick rotation of the camera (via rotating
the Hallway_CCTV_Camera object). The LED actually will be doing a few
things for us that are important. The camera itself is organized so that the
orientation axis is down on the post that connects to the base. The problem
with this is that the forward direction for the camera is straightforward rather
than along the axis that the camera is pointing. The LED, however, is actually
oriented so that its forward direction is straight out to where the camera
would actually be looking. The reason for this piece of trickery will become a
little more clear in a moment.
This camera, of course, was modeled in Maya and brought into Unity via FBX.
When this model is imported, its icon will look like
Figure 15.2
(as we've seen
before).
Notice that the blue square (the traditional symbol in Unity for a prefab) has
a little document symbol in front of it. As we've seen, the great thing about
these objects is that if the model is adjusted in Maya and then replaced in
Figure 15.1
Diagram of camera
organization.
Figure 15.2
Imported model.