Game Development Reference
In-Depth Information
Step 25:
In the Outliner, rename the new IK handle to
AC_L_BallIK
.
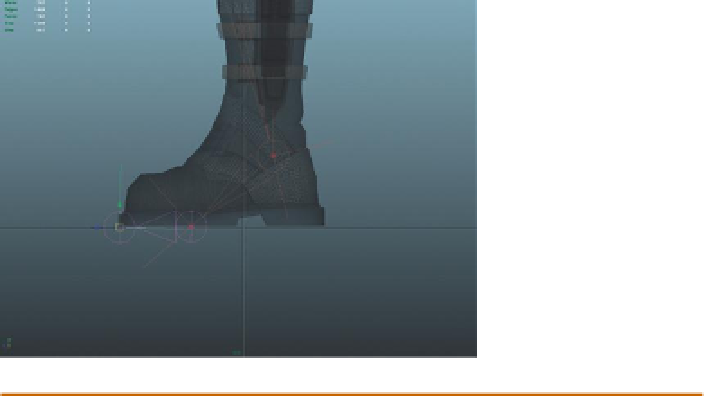
Step 26:
Create one more IK chain from the ball to the toe. Select IK
Handle Tool and in the side-view panel, click once on the ball and a
second time on the toe (
Figure 10.10
).
Figure 10.10
Last IK chain from
ball to toe.
Why?
There are a lot of philosophies on foot rigs. This rig is one of the
most basic but provides a great deal of direct control. There is still
some organizing to do, but when all is done, the feet will have some
great flexibility in movement that will allow for foot and even toe
movement.
Step 27:
Rename the ikHandle to
AC_L_ToeIK
.
Step 28:
Resize IK Handles. Go to Windows>Settings/Preferences>Preferences.
Again, look for the Display section and choose the Kinematics section
from the menu on the left. Change the IK Handle Size setting to 0
.1
.
The IK handles will size down to something more manageable in the view
panels.
Step 29:
Turn on Stickiness for all three IK handles. To do this select
one of the handles in the Outliner. Press Ctrl-A to bring up the
Attribute Editor and look for the IK Handle Attributes area. Expand this
and change the Stickiness setting to sticky. Be sure to do this for all
three handles.
Mirroring the Legs
After the IK handles have been created and named, the leg is done (except for
the handles we will create to control it). That makes this a great time to mirror
the joint chain and automatically create the other leg.
Step 30:
Make AC_L_Hip a child of AC_Root. Do this in the Outliner by
middle-mouse-dragging AC_L_Hip onto AC_Root. After expanding the
chain, it should look like
Figure 10.11
.