Game Development Reference
In-Depth Information
Legs
Creating the crotch area and later the legs uses a few important techniques
to ensure that the geometry created will actually be appropriately deformed
later. A common problem among students is to get the visual form of the
crotch and legs right, but end up with a collection of polys that is nearly
impossible to skin appropriately. These steps will show a good technique for
creating animatable geometry.
Step 96:
Create the geometry that will be used to define the belt and crotch.
Starting from the bottom of the torso modeled earlier, create one extrusion
that will become the belt, and then another that goes down to the bottom of
the crotch. Reshape this bottom “hem line” to match what a speedo or “tighty-
whities” would look like (
Figure 8.79
). Be sure to sculpt this in the front and back.
Step 97:
Add a G-string. Using the Append to Polygon tool, connect a
long poly from the center front to the center back (
Figure 8.80
).
Figure 8.79
Creating the belt and
crotch.
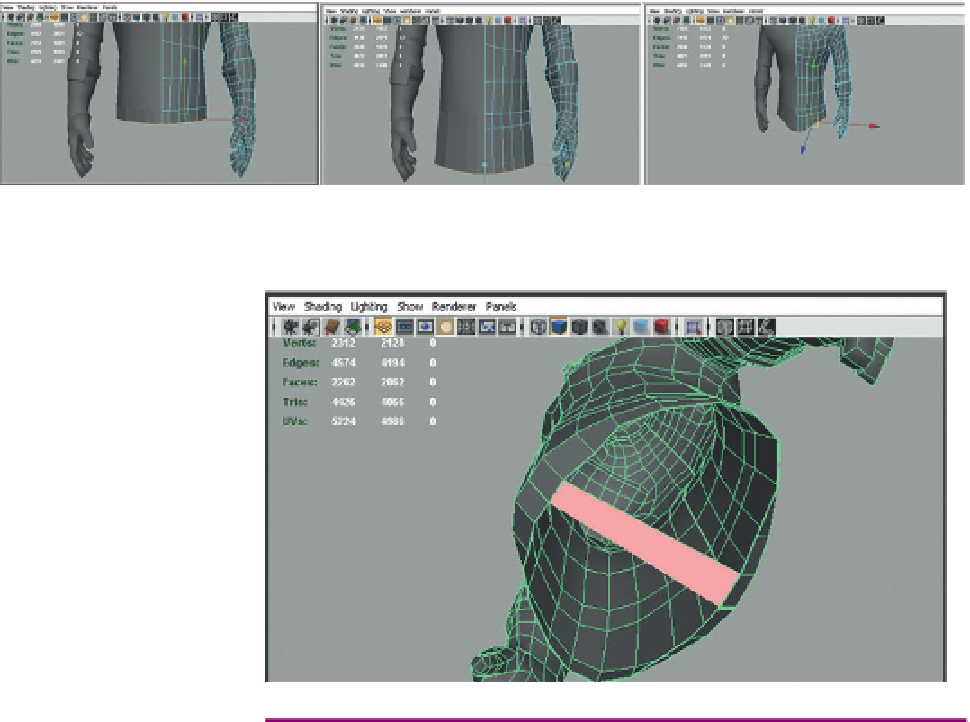
Figure 8.80
Adding a G-string
polygon to connect front and back.
Why?
Note that this also creates a rough ring of polygons from which to begin
extracting the leg. There still needs to have some work done on this
shape, but you can see how the same technique used to create the arm is
beginning to emerge here as well.