Game Development Reference
In-Depth Information
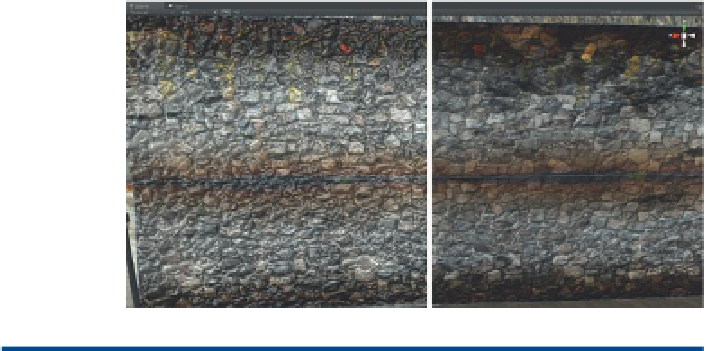
Figure 7.14
Before (right) and after
(left) using the normal map.
Why?
Yes, it appears a bit hyper right now—it is too wet with too much
specular. But because the scene has not been lit yet, we just needed a
glimpse of the visual effect of the process. Later it'll be changed and
made a bit dustier. Do note that normal maps show differently depending
on the lighting that is illuminating it. Upon first applying the normal map,
there may not be a huge difference in the appearance of the surface—
this will come later when additional lights are placed in the scene. If you
would like to experiment with some quick lighting (GameObject>Create
Other>Point Light (or Spotlight or Directional Light)), you can get a quick
feel for how lighting and shading are closely intertwined as the light is
moved around. Don't sweat the lighting too much at this point though.
We will be working much more with lighting in steps to come.
Step 23:
Repeat this process for any surfaces that need a normal map.
This could include the tiles and maybe even parts of the rusty beams.
Don't worry about areas that are mostly smooth (well-worn cement for
example), but areas that should be bumpy need normal maps.
Conclusion
Normal maps can add tremendous depth to a scene. If you are using a quick
tool like CrazyBump, they won't even take very long to implement. We could
have made these while working in Maya, and indeed it would have made
the model look better in Maya. However, because Unity interprets some
things (especially normal maps) differently than Maya does, it is usually not
worth getting too caught up making extensive materials in Maya. Do that
assemblage in Unity.
Tutorial 7.2: Lighting and Baking in Unity
Up to this point, the scene has made use of a very simple lighting scheme—it
had none. OK, well, turning up the Ambient Light in the Render Settings
could
be considered a lighting scheme, but that's stretching it. Ambient light in