Database Reference
In-Depth Information
4.
(Optional) Enter descriptive information for the connection.
The fields that you use most often are the following:
Friendly Name:
The Friendly Name field allows you to specify your own name for the
external source. Enter a name that is descriptive and easy to read.
●
Save Password in File:
Select the Save Password in File check box if you want your user-
name and password to be stored in the workbook. This allows your connections to
remain refreshable when being used by other people. There are obviously security issues
with this option, as anyone can view the connection properties and see your username
and password. Only use this option if your IT department set you up with an application
account; that is, an account created specifically to be used by multiple people.
●
5.
Click Finish to finalize your connection settings.
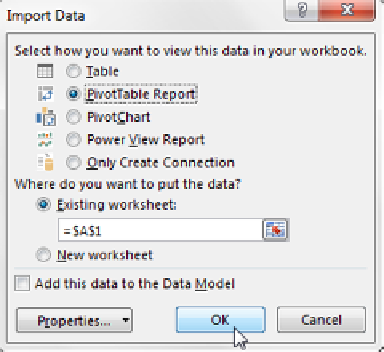
The Import Data dialog box opens, as shown in Figure 11-4.
Figure 11-4:
Choosing how and where to view your SQL Server data.
6.
Choose PivotTable Report to import your data.
7.
Click OK.
When the connection is finalized, you can start building your PivotTable.
In most cases, you set up the data connection one time and update it when needed. You
can even record an Excel macro to update the data on some trigger or event, which is
ideal for automating the transfer of data from SQL Server.
Note


Search WWH ::

Custom Search