Database Reference
In-Depth Information
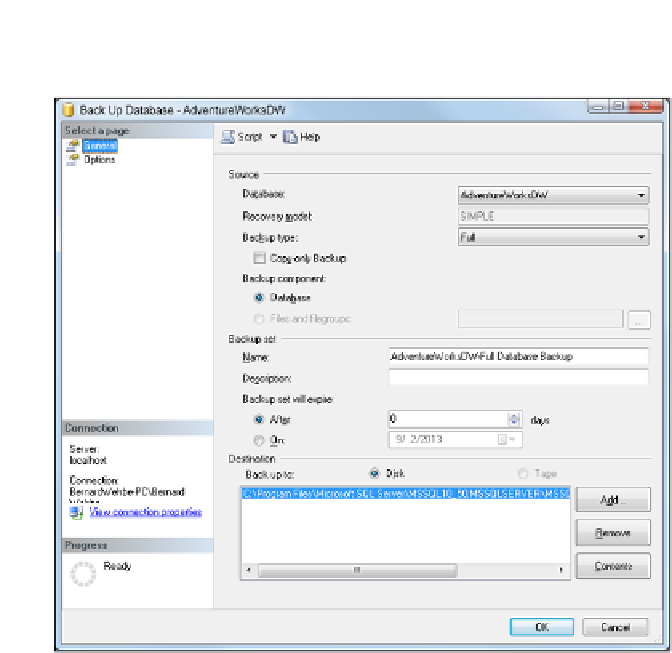
Figure 8-13:
The Back Up Database window.
2.
In the Name box, enter an appropriate name for the backup.
Usually it is best to include the date and time as part of the name you give to your backup.
This allows you to easily recognize when the backup was taken.
3.
Select a location for the backup.
If your system has multiple drives, make sure you select the drive that is designated for
backup.
4.
Click the Options page on the left margin of the Back Up Database window and then select
the Overwrite All Existing Backup Sets option (see Figure 8-14).
5.
Click OK.
Backing up databases allows you to recover data in case data becomes corrupted. Data corruption
could occur due to a human error or in the very unlikely event of SQL Server system corruption. To
restore a database, right-click the database, choose Tasks ➜ Restore ➜ Database. Follow the instruc-
tions to restore the database from the appropriate backup — which is usually the last backup that
included valid data.


Search WWH ::

Custom Search