HTML and CSS Reference
In-Depth Information
Using Web Developer Tools to Better Understand the Box Model
Sometimes working with the box model can be troublesome. Although manipulating the box model affects elements
visually, you can never be sure where the boundaries of the content, border, padding, and margin areas are.
A handy little trick is to apply a temporary border around an element to see exactly how it is laid out, by using the
following declaration on the element you are working on:
border: red solid 1px;
Of course, because this is only a temporary style for your use during the creation of a web page, you can make the
border style whatever you want. Sometimes I find myself using temporary border styles each with a different color
on multiple elements.
Although seeing the border of an element is helpful, it doesn't show the margin area, and you can only guess at
where the content and padding areas are.
Many web developer tools make working with the box model easier, by showing the areas that make up the box
model.
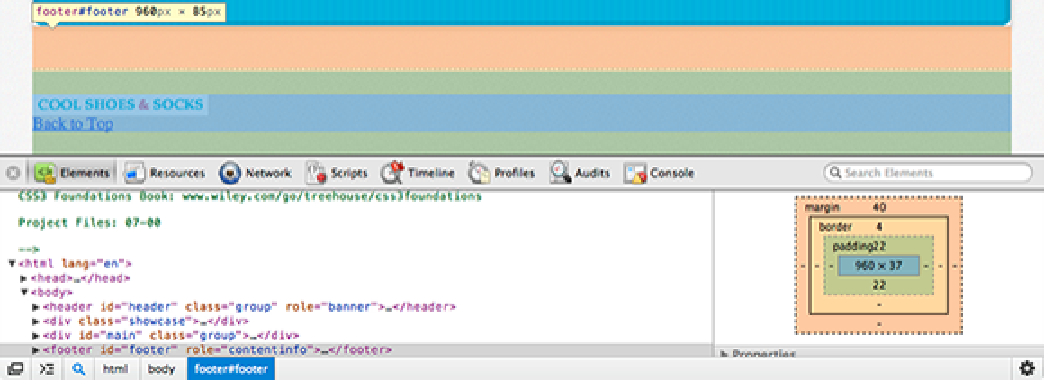
In Figure 7-4, I right-clicked on the footer element and selected Inspect Element to use Google Chrome's web deve-
loper tools.
Figure 7-4
The footer element being inspected in Google Chrome's web developer tools with the simplified box model
in the smaller pane to the right.
Chrome, Firefox (when using Firebug), Safari, and Opera show a visual representation of the box model directly on
the page. All browsers (including Internet Explorer 9+) show a visual representation along with measurements in the
side panel under “Layout” (or “Metrics” in Chrome and Safari).
In Chrome and Safari 6+, each particular area that makes up the box model is color-coded. The blue area is the con-
tent area; green, the padding; yellow, the border; and orange, the margin.
Opera and older versions of Safari don't color-code the areas. Just remember that the content area is the innermost,
followed by the padding, and then margin areas.