Graphics Programs Reference
In-Depth Information
To control the order in which the images are displayed, click the Sort
pop-up menu shown in Figure 3.16 and choose the criteria to use to
organize the images and whether they should be in ascending or
descending order.
To adjust the size of the thumbnails in the filmstrip (and thus the size
of the filmstrip as well), drag the small slider that's near the top of the
filmstrip (or at the left if the filmstrip is at the bottom of the screen).
Drag the large slider to quickly scan among the images in the
filmstrip.
Hovering your cursor near the top center of your monitor reveals the
toolbar as shown earlier in Figure 3.15. The key commands and tools
you need are all right there. Just as with the filmstrip, slide the lock to
make the toolbar always visible while in full-screen mode. Otherwise, it
disappears when you move your cursor. When the toolbar is locked, the image decreases slightly
in size and moves out of the way so nothing is hidden.
3.16
The Sort order
options.
Working with
heads-up displays
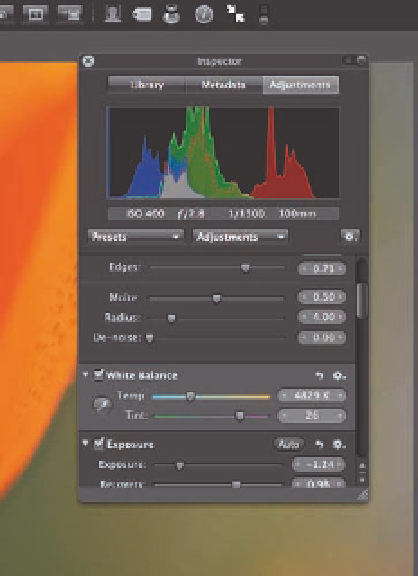
In addition to the toolbar and filmstrip, you
can use a heads-up display version of the
Inspector or the Keywords HUD, as shown in
Figure 3.17. To access the Inspector HUD, click
the Inspector button in the toolbar or press H.
An Inspector appears that floats over your
image. If you slide the lock, the HUD moves to
a vacant side of the interface, and the image
decreases in size to accommodate it. The
Inspector HUD has all the same controls and
options as the Inspector does in the regular
Aperture interface that we covered in Chapter
1. To hide the Inspector, press H or click the
icon again.
3.17
The Inspector HUD.