Graphics Programs Reference
In-Depth Information
Currently, when importing Matching RAW files you must select the project that con-
tains the JPEG images rather than a specific album.
Caution
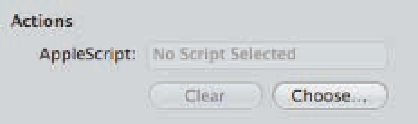
Running actions automatically after importing
In addition to being able to apply adjustment and metadata presets while importing, you can
instruct Aperture to run custom AppleScripts immediately after importing your images. Although
many users will never need this feature, for others it can be a huge advantage, particularly for
those with customized workflows using repetitive tasks. You can create custom actions using
AppleScript so that your images can be uploaded to FTP servers automatically on import, sent to
the Web, inserted into a Keynote presentation, and so on. AppleScript can be used to automate
just about any actions that you do repeatedly.
To apply an action, choose Import Settings
➪
Actions. Then, as shown in the Actions brick in
Figure 2.21, choose the AppleScript to use.
Setting up an
automatic backup
on import
One of the disadvantages of digital images is that the media used to store them can fail. In fact,
every hard drive will fail at some point, including the one in your computer. The hope is that day is
far away, long after you no longer need that particular hard drive. But the harsh reality is that a
hard drive failure can occur at any time. To protect against losing your images, you need to store
them on at least two separate drives. We talk more about creating backups for your Aperture
library in Chapter 10. However, you can create a backup of the files that you're importing during
the import process. That way when you reformat the memory card to reuse it, you still have your
files stored in two places. We strongly recommend that you take advantage of this feature.
2.21
Use Actions to apply custom AppleScripts
to your images immediately after import to save
time.
To automatically back up your files on import, take these steps:
1.
Connect a backup drive to the computer and choose Import Settings
Backup
Location.
The drive appears in the Backup To pop-up menu, as shown in Figure 2.22.
➪
2.
Select the backup drive.