Graphics Programs Reference
In-Depth Information
Using the Retouch Brushes
Without a doubt, the Quick Brush that we use the most frequently is Retouch in order to remove
dust spots due to dirt on the sensor. We also use the Retouch Quick Brush to remove other distrac-
tions. To use Retouch, follow these steps:
1.
We recommend zooming in to 100 percent magnification when removing dust
spots.
Otherwise it's quite possible that you'll miss some of the smaller spots and then
be embarrassed when they suddenly are more visible when you output the image at a
larger size. Begin in one corner and then move in a uniform way across the image and
then down, making sure not to miss any areas.
2.
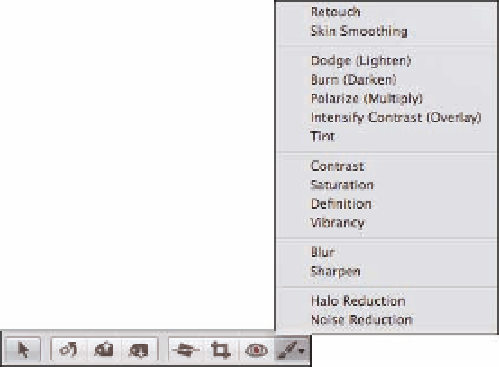
When you encounter a dust spot or streak, press X to access the Retouch tool or
click the Brushes icon beneath the Viewer to the left, as shown in Figure 6.37 and
choose Retouch.
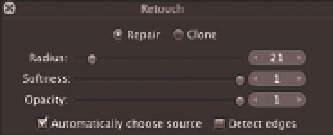
A small dialog appears.
6.37
Access the Retouch tool from the Brushes icon and the Retouch dialog appears.
3.
Select Repair or Clone.
In Clone mode, Aperture makes an exact copy of the good pix-
els and places it over the area you want to hide. At times this is exactly what you need,
but you have to be careful not to create obvious repetitions of areas because that will
broadcast the fact that you cloned something out. In the Repair mode, Aperture copies
the texture from good pixels but blends the color with the color in the problematic area.
Often this leads to more subtle results, but which mode is better will depend on the area
of the image that you're fixing, how detailed the area is, and whether the detail in the
surrounding areas is similar or totally different. There are no hard and fast rules to follow