Graphics Programs Reference
In-Depth Information
should be white by selecting it and then clicking on anything white in the image. Use the Gray
dropper to balance the colorcast in areas that should be a shade of gray without a colorcast. As
you use each eyedropper you'll see the position of the center point on the Tint wheels move as
well as see the color change in the image. Of course, you can still manually drag the position of the
Tint wheels to suit your taste.
Although we don't use the Tint wheels often, we do find them helpful for modifying the colorcast
of shadows or highlights, especially when we want to warm the highlights slightly. The Tint wheels
can also be helpful if your image was shot with a mix of lighting types such as fluorescent, tung-
sten, and daylight.
Using the Highlights & Shadows adjustments
The Highlights & Shadows controls enable you to reveal more detail in the highlights and/or shad-
ows of your image. We find the Highlights & Shadows adjustments very helpful with contrasty
images where detail has been recorded in the highlights and shadows, but was initially too light or
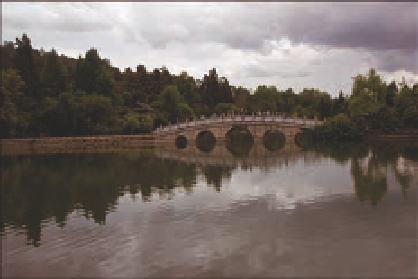
too dark to easily see, as shown in Figure 6.23.
6.23
Use the Highlights & Shadows controls to reveal more detail in the lightest and darkest areas of
your image.
We recommend that for best results you use the expansion arrow to reveal the Advanced controls,
as shown in Figure 6.24.
To use the Highlights & Shadows controls, do the following:
1.
Set the Highights or Shadows slider for the amount of lightening for the shadows
and/or darkening for the highlights
. You may need to modify the setting after you
adjust the other controls.