Graphics Programs Reference
In-Depth Information
With some adjustments, you can use the arrows at either end of the scrubby field to
type values that are more extreme than those that are possible by using the slider.
Genius
Brushing adjustments in or out
Most (but not all) adjustments have the option to be brushed in or out from the Action pop-up
menu as shown earlier in Figure 6.9, while some also contain a brush icon to directly access the
brush in or out of the dialog. The ability to brush the effect in or out without needing to make a
separate selection is a huge addition to Aperture 3. To brush an adjustment in (or out), do the
following:
1.
Apply an adjustment.
Initially it affects the entire image.
2.
Choose Brush adjustment In or Away from the Action pop-up menu at the top right
of most adjustment bricks.
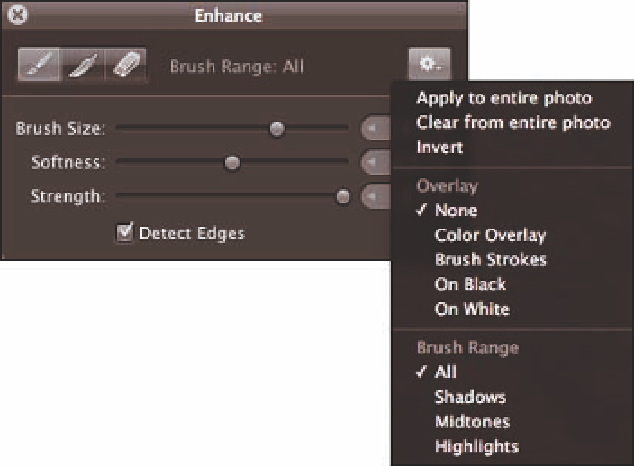
A new, small dialog appears, as shown in Figure 6.10. If you
opt to brush the adjustment in, the brush is selected and the effect disappears from the
entire image preview, whereas if you opt to brush it out, the eraser is selected and the
effect remains.
6.10
This dialog contains a lot of powerful controls to help you make localized adjustments.
3.
Set the brush parameters in the dialog.
Choose the size of the brush.
Normally, we work using a magnified view so that we
can work accurately
l