Graphics Programs Reference
In-Depth Information
If there's an image that you want to get rid of, choose Metadata
Rejected or press 9 on
your keyboard. This command displays an
X
in the ratings badge, and when you move to the next
or previous image, the rejected image disappears from the Browser (later in this chapter, when we
discuss searching for images, we show you how to see your rejected images within an album or
project).
➪
Rating
➪
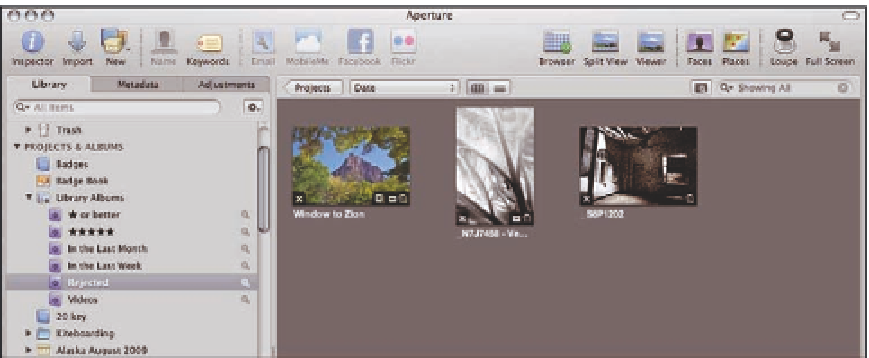
Under the Library Albums group in the Library Inspector, there's a Rejected Smart Album, shown
in Figure 4.3. Clicking it shows all your rejected images in Browser, just like any other album. If you
want to unreject an image, select it and set its rating to something other than rejected, be it
unrated or one to five stars. If you really want to get rid of these images, click inside Browser and
choose Edit
➪
Select All. Then choose File
➪
Delete Master Image and All Versions.
4.3
The Rejected Smart Album in the Library Albums group and its contents.
It's a good idea to periodically click on the Rejected Smart Album to see if there are
any images that you can delete to free up hard drive space.
Caution
Prior to Aperture 3, choosing Delete Master Image and All Versions would have removed the
images from Aperture and moved the master files to your system's trash. However, as discussed in
Chapter 1, this command instead moves your images to Aperture Trash in Aperture 3.
If you realize that you made a mistake deleting one of these images, follow these steps to retrieve it:
1.
Select Trash in the Library Inspector.
2.
Select the image you want to retrieve.
3.
Control-click on that image and choose Put Back.