Graphics Programs Reference
In-Depth Information
the images you select. You won't be able to make any adjustments while you're in Quick Preview
mode, and we suggest you not make any decisions about the final sharpness or exposure because
the Quick Preview version may differ considerably from the actual file.
Still, it's a good way to quickly get a sense of the images you've captured. To exit Quick Preview,
click the Quick Preview button again.
Viewing the master image
While you work in Aperture, as long as you're not using Quick Preview
mode, the image preview in the Viewer updates to reflect all your
edits. Although you can toggle any particular adjustment off and on
using the check boxes in the Adjustments panel, sometimes it's helpful
to glance at the original image to make sure you're heading in the
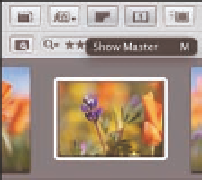
right direction. The fastest way to do that is to click the Show Master
button shown in Figure 3.21.
Show Master button
3.21
Click the Show
Master button to see
the master file with no
adjustments.
The image in the Viewer reverts to the original before you applied any
adjustments, although all your adjustments are still intact. To return to
edited view, click the Show Master button again.
Configuring and Using Metadata
Overlays
Most of the time, you'll want to be able to see certain
information about your images at a glance. For exam-
ple, you'll want to see any ratings, labels, or flags that
you've applied, whether you've assigned keywords,
whether you've edited the image in a plug-in or exter-
nal editor, and so forth. But some of the time you may
want to just see the image without any distractions,
and at other times you may want to see even more
information about the files. You can use the Metadata
Overlays pop-up menu in the tool strip, shown in
Figure 3.22, to control the display of metadata in the
Viewer and the Browser as follows:
Browser & Viewer Metadata Overlay button
3.22
Click the Browser & Viewer
Metadata Overlay button to apply
metadata overlays.


