Game Development Reference
In-Depth Information
5.
We want the head icon to be able to control the IK handle, so parent the handle to
the head icon.
6.
Move the IK handle out so it lines up with the head icon (
Figure 12.66
,
bottom).
This makes the head's position more accurate.
Now the head joints will track the head icon; you can see this in
Figure 12.67
,
middle. You can even use the head icon's Z rotation to tilt the head. Before we fin-
ish with this stage of the rigging, we can add another effect.
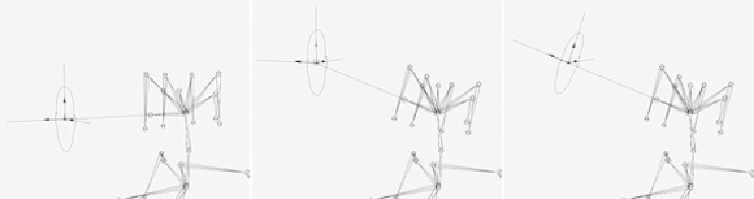
FIGURE 12.67
Use an aim constraint to get the head icon to stay focused on the head.
7.
Select the head joint and then the head icon, and go to Constrain > Aim. In the
constraint options, set the Aim Vector to be -1 in the Z axis (with 0 in X and Y),
and set the Up Vector to be 1 in the Y axis (with 0 in X and Z).
Now when the head icon moves, not only does the head joint track its movement,
but the head icon stays oriented toward the head (
Figure 12.67
,
right). This makes
it easier to control.
Thefirststageofthehead'ssetupiscomplete.Nowweneedtocheckthehead'srotationor-
der, altering it to prevent
gimbal lock
. See the sidebar
“
Rotation Order and Gimbal Lock
.”