Game Development Reference
In-Depth Information
6.
Finally, select the edges where the new join is and go to Polygons > Sew UVs to
join them (
Figure 8.38e
).
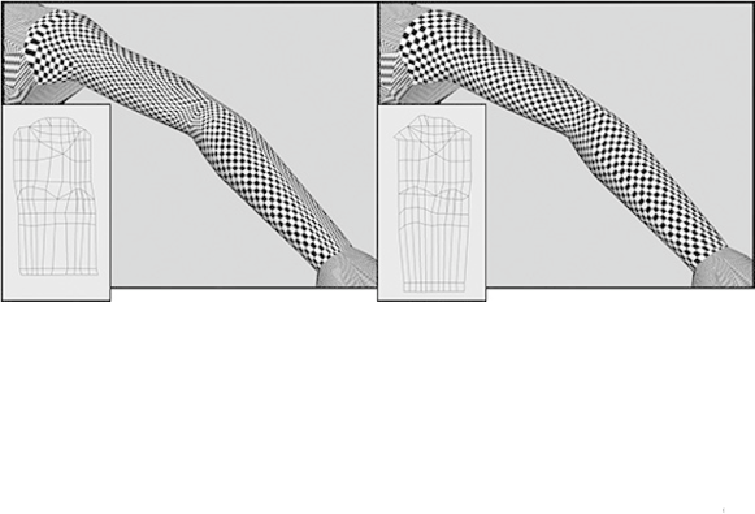
Now comes the fun part. We have our basic UV map showing us an unwrapped version of
the arm. The problem is that some areas are still stretched and do not fit correctly. We're
going to edit the UVs individually in the UV Texture Editor, trying to get the grid on the
arm as perfect as possible.
The checkered texture works well as a guide. Try to keep the squares square and propor-
tionate (
Figure 8.39
). This can be a tedious job, but when the UVs are correctly laid out,
your texture will not stretch or look incorrect. Once you have spent time painting the tex-
tureinPhotoshop,thelastthingyouwantisforittoappearwarpedontheactualgeometry.
FIGURE 8.39
Work on the UVs individually, keeping the squares in the texture square.
Note
Keep in mind that you will not be able to remove all of the stretching from
the texture. I suggest that you concentrate on the larger areas that will hold
detail. The main forearm, elbow, and shoulder will be most visible, where-
as the underneath part of her arm won't be seen most of the time.
The arm is done; let's get to the torso UVs.
Torso UVs
We will approach the torso from a slightly different angle, this time we will begin by
planar-mapping the front and back before tweaking the UVs in the UV Texture Editor.