Game Development Reference
In-Depth Information
3.
Select the top of the extrusion and use the Extrude Face tool again, this time set-
4.
Work on the new faces, collapsing the top edges to create the point (
Figure 7.26d
).
Don't delete the inner, back faces created by the extrusion as these could be seen
as the character moves around.
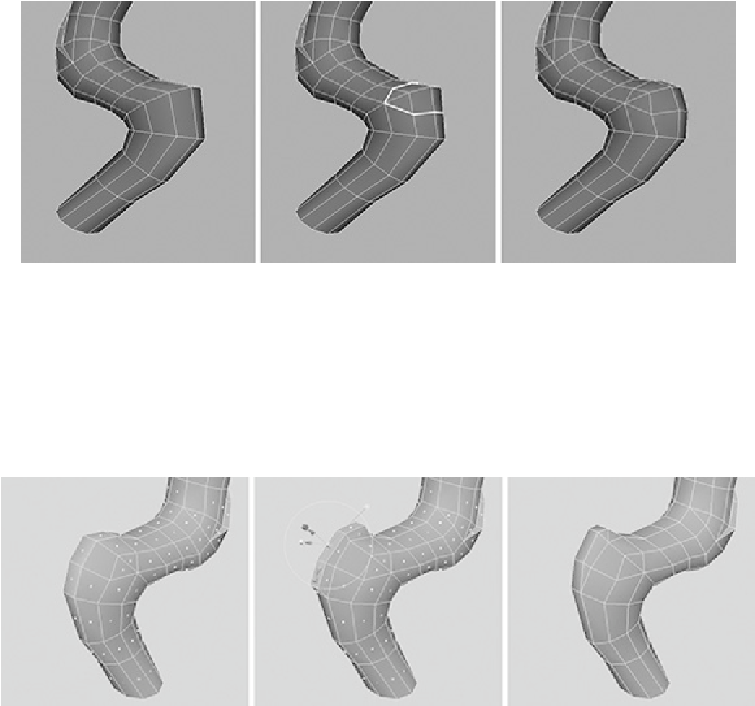
Let's move on to the next joint in his leg, the one at the back. Again, this looks quite angu-
lar, so add some new divisions and adjust them to smooth out the joint. As you can see in
Figure 7.27
,
these divisions don't need to go all the way around the leg.
FIGURE 7.27
Add new divisions to the next joint.
With the overall shape of the leg in place, we can next work in some more detail, adding
the knuckle to the back of the leg.
Back Leg Knuckle
Let's begin by adding the top part of the knuckle. Do this by extruding the three faces
shown in
Figure 7.28
and then adjusting the vertices to get the right shape.
FIGURE 7.28
Extrude the faces at the back of the leg to create the knuckle.