Game Development Reference
In-Depth Information
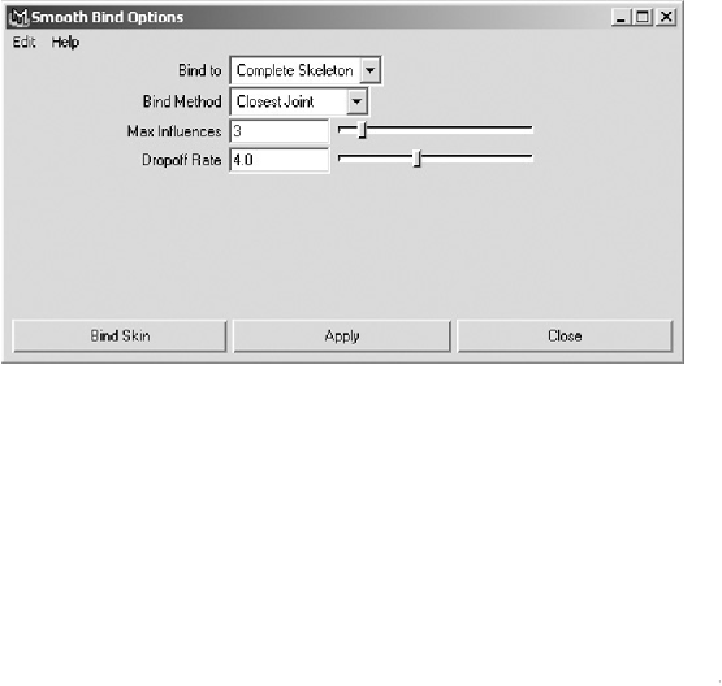
3.
Make sure your Smooth Bind options are configured in
Figure 6.4
.
The important
sections are Max Influences and Dropoff Rate.
FIGURE 6.4
Setting Smooth Bind options
Smooth Bind Settings
Max Influences
specifies the number of joints that can influence each vertex. For
example, setting this to 1 would mean that the forearm joint only influenced the
vertices near it, which could make the character deform badly and look quite ri-
gid. This number may depend on the game engine you are using, so discuss the
setting with your lead artist first. Usually, 2 or 3 is a good number for Max Influ-
ences.
Dropoff Rate
dictates how rapidly a joint's influence decreases as it moves away
from the joint. The default is 4, which works well for most characters.
4.
When you're ready, click Bind Skin to continue. The wireframe on your mesh
should turn pink, indicating that the joints are connected to the mesh.
5.
Switch to the top view and turn on Smooth Shade All in the Shading menu.
In
Figure 6.5
you can't see the joints, but it doesn't matter—Maya has a priority
list that dictates which things get selected before others. Joints are higher on this
list than polygons, so if you drag a selection over the forearm you will select the
elbow joint.