Agriculture Reference
In-Depth Information
thOrny MatterS
If milk has started to turn before you begin the process, the bacterial balance will be damaged and you
may not get the chemical reaction you need for a clean break.
Hum the nursery rhyme and pretend you are Miss Muffet, because now the curds and whey must
be cut. Each recipe will vary, telling you how to cut or stir the curds. Often, you will slice it with a
long knife, making parallel lines until you have cubes of the directed size. Sometimes, you will be
directed to simply stir them.
After straining the curds, retain the leftover whey to be used in other capacities.
(Photo courtesy of Brian Boucheron)
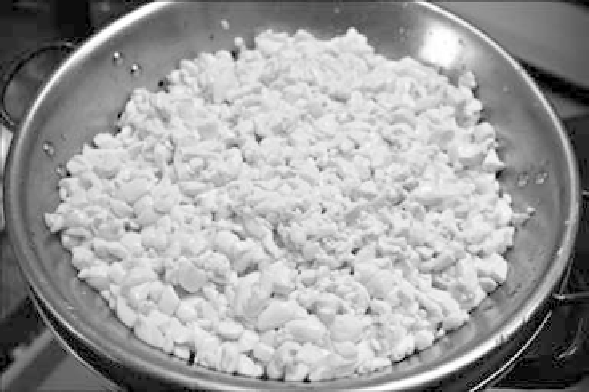
Next, the curds must be set. This is achieved by reheating them just a bit—the warmer, the firmer,
but not much more than 100°F or you will kill the enzymes—and gently stirring by hand to ensure
that it heats thoroughly without burning anything at the bottom. The warming will contract the
curds, changing the consistency again.
When the desired consistency is reached, remove them from the heat, and the curds should sink
into the whey. Now, they must be separated and salted. Salting the cheese inhibits the bacterial
process and helps eliminate the moisture from the cheese. It is at this point that you have cottage
cheese, and can reserve some before moving on with the rest of it.
Some cheeses can simply hang in cheesecloth to allow the whey to drip out. They will not be very
firm, but they are good to begin with to get accustomed to the process. Others will need to be
pressed. For $100 to $200, you can find a cheese press. Or you can fashion one yourself out of
PVC pipe, a wooden block, and some other odds and ends. The goal of the press is to remove as
much whey from the curds as possible. Firmer cheeses will require more pressure.