Graphics Programs Reference
In-Depth Information
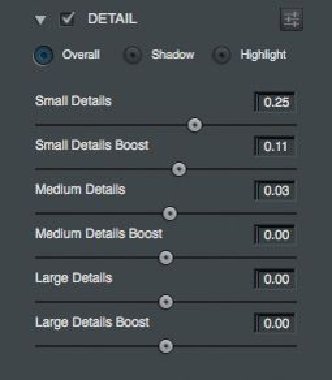
Figure 6.16
The Topaz Detail plug-in
12.
Because we applied the plug-in to a Smart Object (the editor layer), the plug-in has
been applied as a Smart Filter that has a layer mask attached. We want the effect of
the plug-in applied only to the model and not the background, so hide the effect by
converting the layer mask to black. Click the layer mask, then go to Image > Ad-
justments > Invert.
13.
With a white foreground color, choose a brush with approximately 25% hardness
and 100% opacity. Paint the layer mask over the model's shirt to reveal the effect
of the Detail plug-in. Then, as the effect would be too strong at 100% on the skin,
reduce the opacity of the brush to 40% and paint the layer mask over the rest of the
model (hair, face, arm, and hand).
Adding Color to the Background
Before we add the colored background and the spotlight, we need to combine all the layers
into a Smart Object. This is so that we have a layer containing all the retouching we've
done to this point.
We could create a merged layer at the top of the layer stack, but we couldn't then go back
to make further adjustments. It's smarter to combine the layers into a Smart Object.
1.
Click the top layer so that it is active, then Shift-click the layer at the very bottom
of the layer stack; this selects all the layers. Choose Convert to Smart Object from
the menu in the upper-right corner of the Layers panel.

Search WWH ::

Custom Search