Graphics Programs Reference
In-Depth Information
As is always the case, the lighting at the time of the photo shoot is vital, but what do you
do if you want to alter it or add to it during retouching?
In this section I show you how to do exactly that using the same gradient lighting technique,
but instead of an overall lighting effect we'll use it to change the lighting on a person.
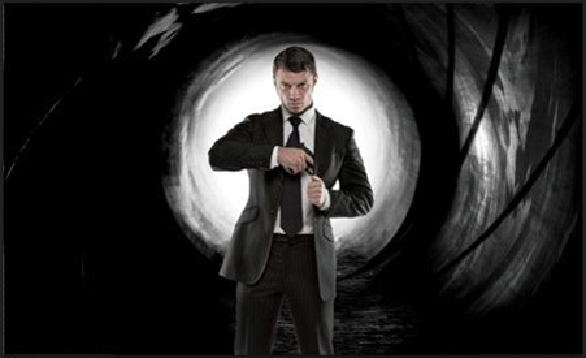
In
Figure 3.19
you can see that the lighting on the tunnel and the lighting on our model
don't match. This is because he has rim light on either side. So we need to remove or reduce
it.
Figure 3.19
1.
With the image file open, set the foreground and background colors to their default
of black and white by pressing D on the keyboard, and click on the layer contain-
ing the cut out of the Special Agent. Then click the fx icon at the bottom of the
Layers panel and choose Gradient Overlay.
2.
In the Gradient Overlay dialog, click the gradient to open the Gradient Editor, and
choose the second gradient on the top row (Foreground to Transparent).
3.
Click OK, and in the Layer Style properties change the Angle to 0 degrees, which
will make the lighting effect go from dark on the left, and fade to transparent.
(Note: You can choose any angle, but 0 degrees works best in this picture so that
we can darken one side of our model.)
4.
With the Gradient Editor dialog open, place your cursor on top of the image, then
click and drag left or right to position the lighting effect exactly where you would
like it. Click OK to accept the changes (
Figure 3.20
)
.
Search WWH ::

Custom Search