Graphics Programs Reference
In-Depth Information
TIP: Controlling Lights Out Mode
You have more control over Lightroom's
Lights Out mode than you might think:
just go to Lightroom's preferences (under
the Lightroom menu on a Mac or the Edit
menu on a PC), click on the Interface tab,
and you'll find pop-up menus that control
both the Dim Level and the Screen Color
when you're in full Lights Out mode.
Step Three:
If you want to view your grid of photos
without distractions in the Lightroom
window, press the
F
key on your keyboard
twice. The first time you press F, it makes
the Lightroom window fill your screen
and hides the window's title bar (directly
above the taskbar in Lightroom's interface).
The second F actually hides the menu bar
at the very top of your screen, so if you
combine this with Shift-Tab to hide your
panels, taskbar, and Filmstrip, and
T
to
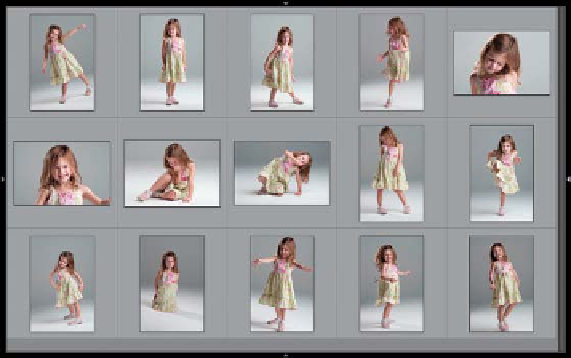
hide the toolbar, you'll see just your photos
on a solid top-to-bottom gray background.
I know you might be thinking, “I don't
know if I find those two thin bars at the
top really that distracting.” So, try hiding
them once and see what you think. Luckily,
there's an easy shortcut to jump to the
“super-clean, distraction-free nirvana view”
you see here: you press
Command-Shift-F
(PC: Ctrl-Shift-F)
, then
T
. To return to
regular view, use the same shortcut. The
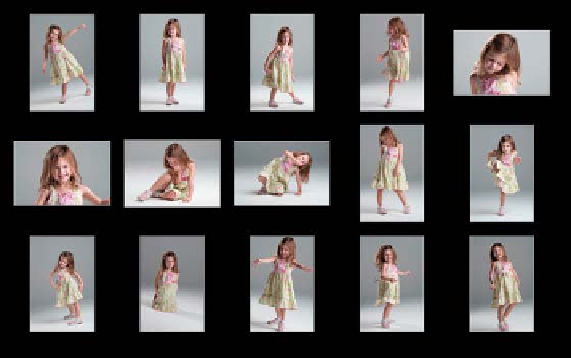
image on top is the gray layout you just
learned, and on bottom, I pressed L twice
to enter Lights Out mode.


