Graphics Programs Reference
In-Depth Information
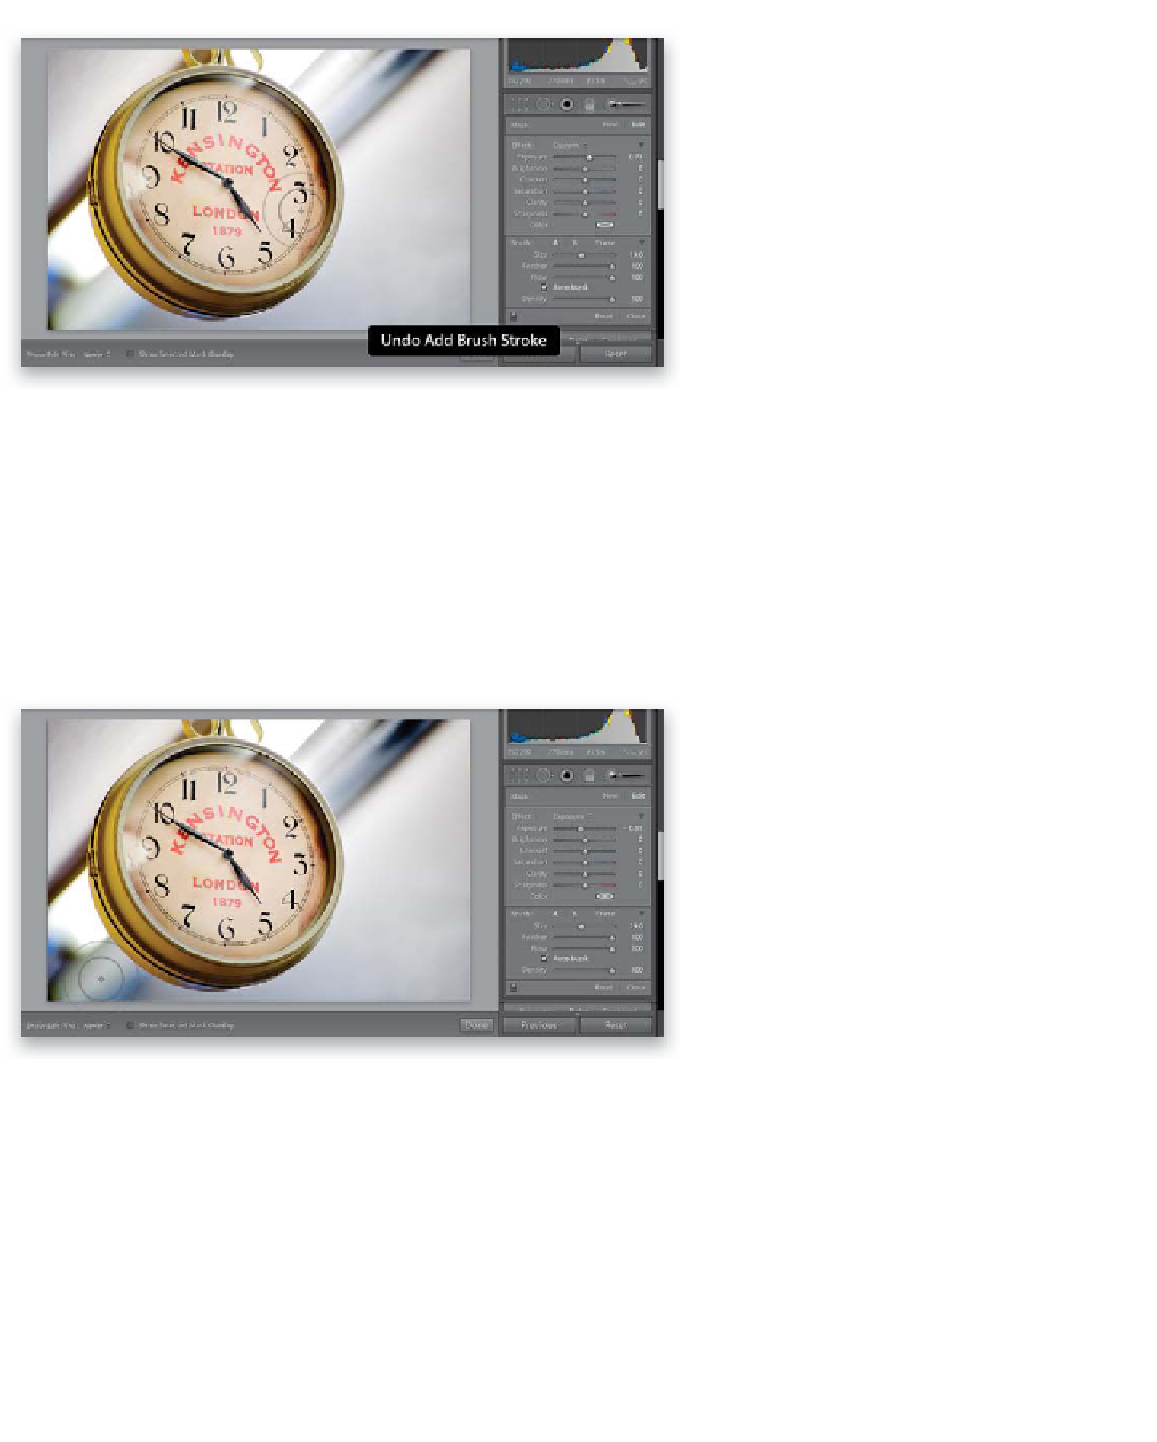
The Fifth Point:
Local Adjustments
Local adjustments are anything you do
that affects just one part of your photo,
and the tools that do this are found right
below the Histogram panel (more on this
in Chapter 5). For example, to make just
the face of the clock brighter (without
affecting anything else), click on the Adjust-
ment Brush, then choose Exposure from
the Effect pop-up menu that appears in
the Adjustment Brush options panel (it
appears below the brush when you click
on it). Drag the Exposure slider to the right
a bit, then take the brush and paint over
just the face of the clock (as you see here).
If you make a mistake, press
Command-Z
(PC: Ctrl-Z)
to undo your stroke (as shown
here), then start again. Also, make sure
the Auto Mask checkbox is turned on—it
helps keep you from accidentally painting
outside the face of the clock. After you've
painted over the face, you can still adjust
the exposure by dragging the slider.
Now let's use the same tool to darken
parts of the background, so the clock really
stands out (in the last step we “dodged,”
making certain areas of the image brighter,
and now you're going to “burn,” making
parts darker). Click on New at the top of
the options panel, drag the Exposure
slider to the left to -75, then start painting
on the diagonal bar behind the clock (as
shown here). If, after painting, you think
it looks too dark, just raise the Exposure
amount, like I did here where I raised it a
little to -61.
Continued