Graphics Programs Reference
In-Depth Information
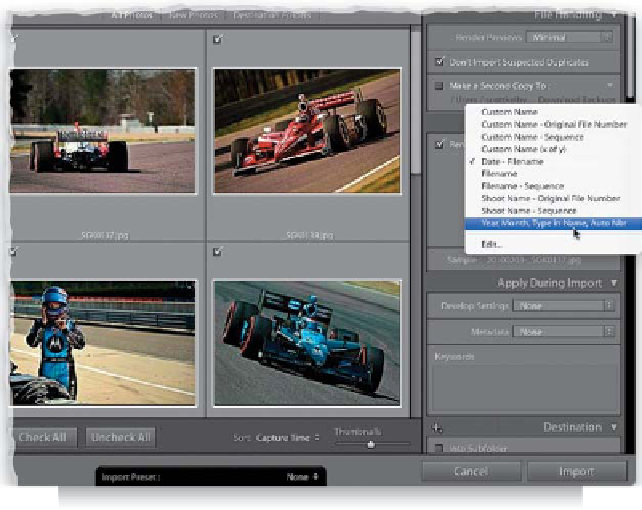
Step Seven:
Once the little naming example looks
right to you, go under the Preset pop-up
menu, and choose
Save Current Settings
as New Preset
. A dialog will appear where
you can name your preset. Type in a de-
scriptive name (so you'll know what it will
do the next time you want to apply it—
I chose “Year, Month, Type in Name, Auto
Nbr”), click Create, and then click Done in
the Filename Template Editor. Now, when
you go to the Import window and click on
the File Renaming panel's Template pop-up
menu, you'll see your custom template as
one of the preset choices (as shown here).
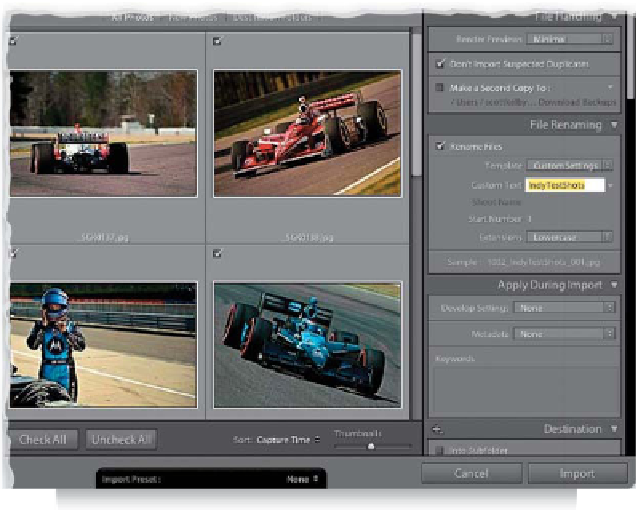
Step Eight:
Now, after you choose this new naming
template from the Template pop-up menu,
click below it in the Custom Text field (this
is where that Custom Text token we added
earlier comes into play) and type in the
descriptive part of the name (in this case,
I typed in “IndyTestShots,” all one word—
no spaces between words). That custom
text will appear between two underscores,
giving you a visual separator so everything
doesn't all run together (see, it all makes
sense now). Once you type it in, if you look
at the Sample at the bottom of the File Re-
naming panel, you'll see a preview of how
the photos will be renamed. Once you've
chosen all your Apply During Import and
Destination panel settings, you can click
the Import button.