Graphics Programs Reference
In-Depth Information
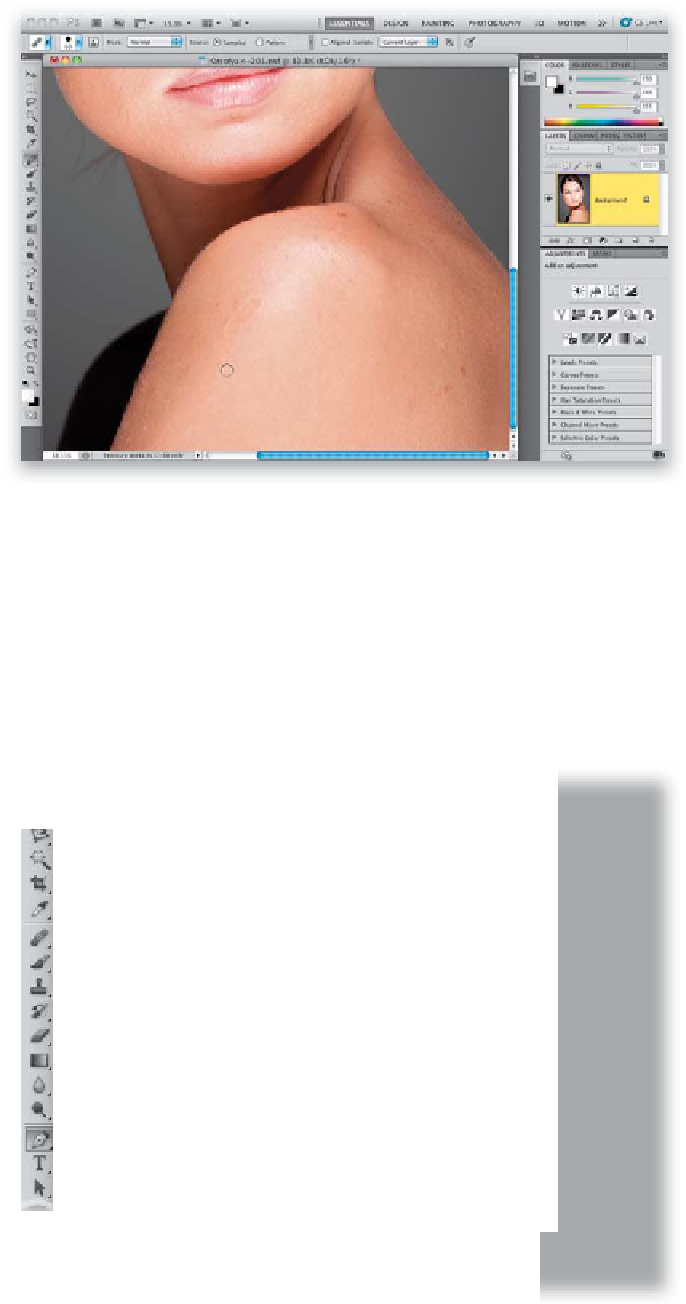
Step Three:
Now, let's head over to Photoshop.
Press
Command-E (PC: Ctrl-E)
and in a
few moments, your image will appear in
Photoshop (as shown here). Of course,
that's providing you have Photoshop (if
you're using Photoshop Elements instead,
it will open in Elements). I always start a
retouching project by removing blemishes
first. Technically, I could have removed
these in Lightroom, using the Spot Removal
tool, but I'm faster with Photoshop's Healing
Brush, and I like to use Photoshop's Patch
tool for larger blemishes. So, if I'm going
to Photoshop anyway, I do the blemish
removal there. Get the Healing Brush (press
Shift-J
until you have it), make your brush
size a little larger than the blemish you want
to remove, then put your brush cursor over
a clean spot near the blemish. Option-click
(PC: Alt-click) on the clean spot, then move
your cursor over the blemish, and click
once to remove it. Don't paint—just click.
Step Four:
If you want to remove a scar, or a bigger
blemish (or a group of them), switch to
the Patch tool (press
Shift-J
until you have
it) and draw a loose selection around the
blemishes. Click inside the selection, drag
it to a clean area of skin, and release the
mouse button. It snaps back into position,
and your blemishes are gone. Here, you see
the image after about 60 seconds with the
Healing Brush and Patch tools. Let's move
on to the next thing: some strands of hair
from her ponytail are sticking out. You'd
use the Clone Stamp tool to remove this
(it's an easy retouch), but you don't want
to accidentally erase part of her cheek or
neck, so I always start by putting a selection
around the area I'm going to clone away
first. Then you can only clone inside that
selected area, so you can't accidentally
clone outside it and damage her cheek or
neck (I made the selection here using the
Pen tool, then converted it to a selection,
but use any selection tool you like).
Continued