Graphics Programs Reference
In-Depth Information
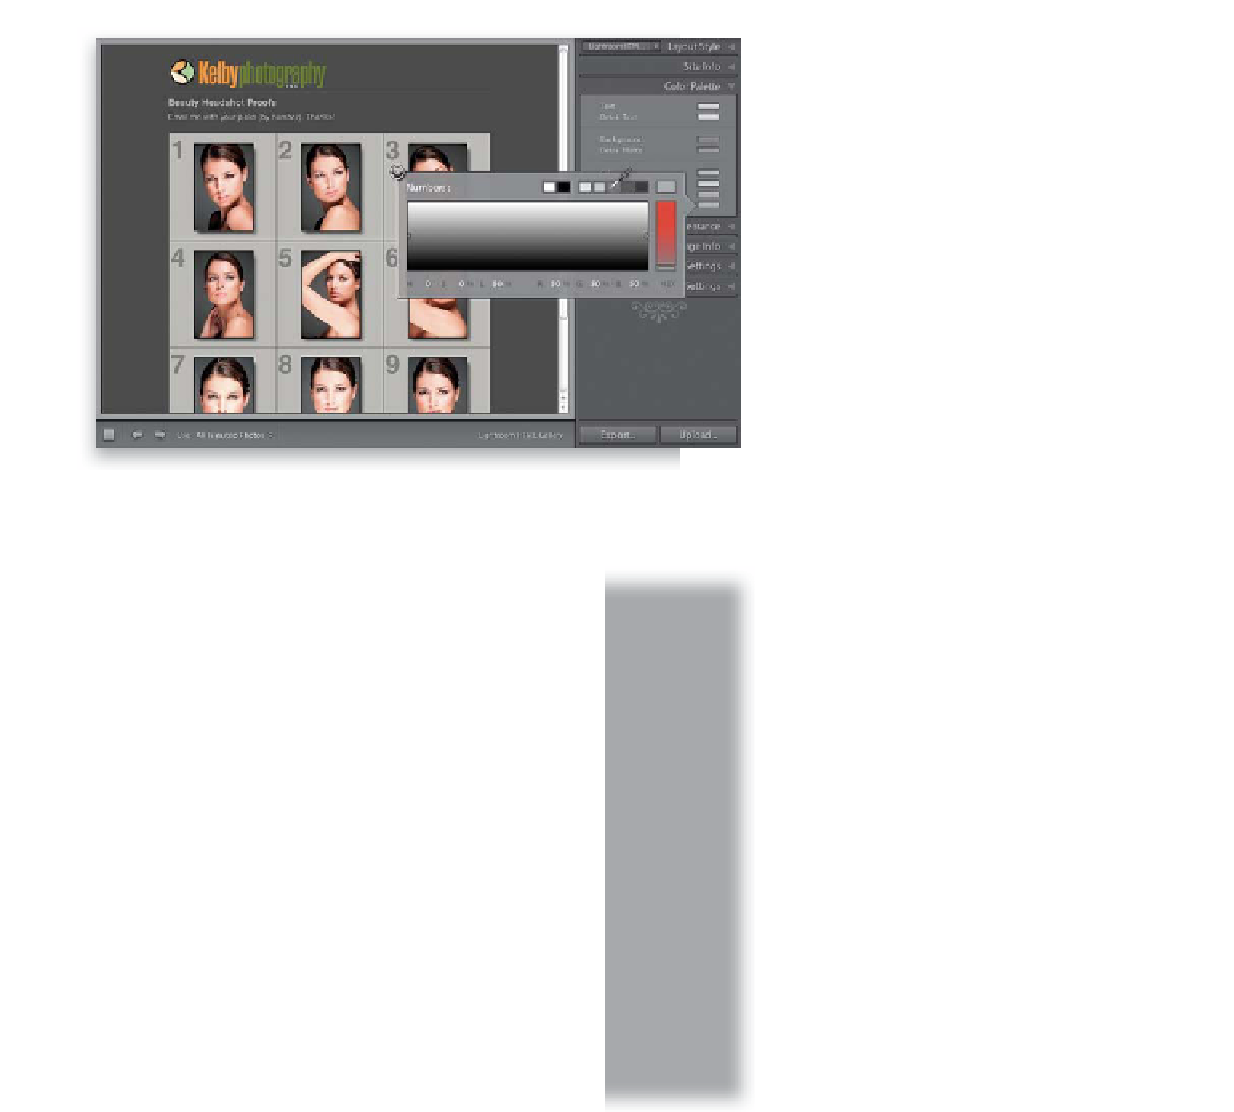
Step Three:
One thing I always change in this default
template is the color (darkness) of the
numbers. I've had clients mention that
they really didn't notice them at first, so
I always make them a little darker. Scroll
down to the Color Palette panel (in the
right side Panels area), and you'll see a
Numbers color swatch. Click on it to bring
up the Numbers color picker, and click on
a darker gray color swatch at the top (as
shown here). You see a live preview as you
choose different shades of gray, so just pick
one that contrasts with the background
enough that the numbers easily stand out,
then close the color picker by clicking on
the little X in the upper-left corner.
Step Four:
You're pretty much ready to go, but at
this point, I always preview the webpage
to see how the final will look (and to test
everything to make sure it works, including
my email link). So, click the Preview in
Browser button at the bottom of the left
side Panels area, and it will launch your
Web browser and open your proofing page,
so you can see a real preview of the final
working webpage (as seen here). I click on
the thumbnails to see if I like how the
larger-sized previews look (if this larger
preview seems too small, you can change
the size in the Appearance panel), and
I always check the email link to see if
it launches my email program and puts
in the right email address. If everything
looks good, click the Export button at the
bottom of the right side Panels area to
save your HTML webpage for uploading
to the Web. If you're hosting your own
website on your server, you can direct
Lightroom to an FTP site by clicking the
Upload button instead (right next to the
Export button. Again, more on all of this
stuff back in Chapter 12).