Graphics Programs Reference
In-Depth Information
At this point, we've got the photos we want to show our client tweaked (or
you're showing them pretty much “as is”), and it's time to put these proofs on
the Web so the client can make a decision. We're going to use Lightroom to
create a simple proofing webpage—the same one I use myself for client proofing—
and it just takes a couple of minutes to get it up and running, because we're
going to customize one of the built-in templates that come with Lightroom 3.
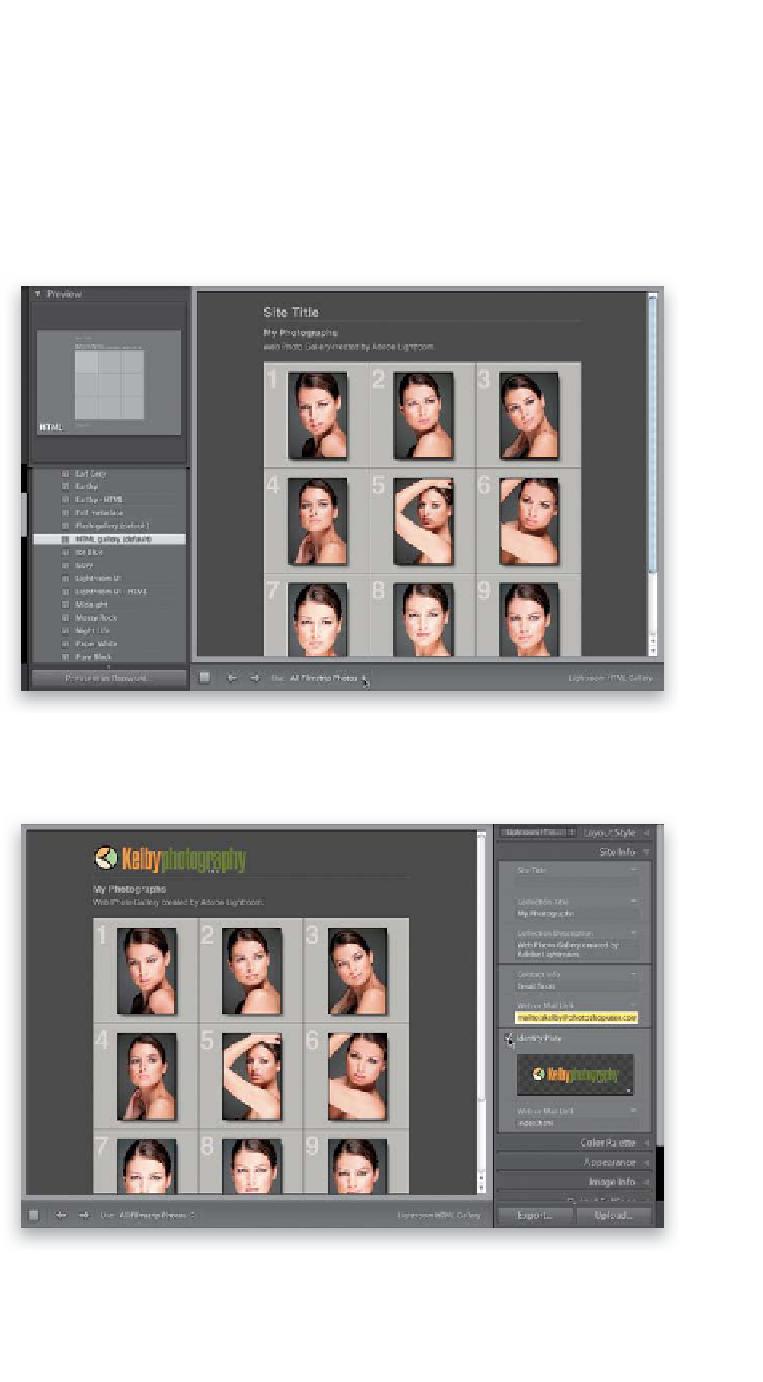
Step One:
Go to the Web module, and in the Collec-
tions panel in the left side Panels area,
click on your Selects collection. This loads
your photos into whichever Web template
you used the last time you were here in
the Web module. Also, in the toolbar,
make sure that
All Filmstrip Photos
is selected in the Use pop-up menu (as
shown here). We're going to customize
one of the built-in templates, so go to the
Template Browser panel in the left side
Panels area and click on HTML Gallery
(Default), shown here. One of the main
reasons I like using this particular template
for proofing is that it puts a large number
in the top-left corner of each cell, which
makes it easier for clients to tell you which
photos they've approved.
Step Two:
Let's spend two minutes customizing the
look and text of this template. First, if you
have an Identity Plate with your studio's
name, turn that on (as shown here, in the
Site Info panel in the right side Panels area).
If not, just click directly on the words
“Site Title” (right on the webpage itself)
and type in your studio's name. Then add
any other lines of text you want by clicking
on the placeholder text and adding your
own. Also, add your email address in the
Web or Mail Link field, beneath the Contact
Info field, in the Site Info panel (all this is
explained in detail back in Chapter 12).
Plus, you might want to change “My
Photographs” to something a bit more
meaningful, eh?