Graphics Programs Reference
In-Depth Information
Lightroom Killer Tips
> >
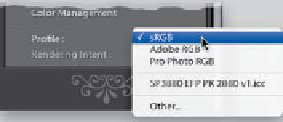
to the color space your lab prefers (which
is usually sRGB for color labs). That way,
when you save it as a JPEG, you won't
forget to embed the right color space.
▼
Can't See Your Rulers?
If you're pressing
Command-R (PC:
Ctrl-R)
and you can't see your printing
rulers (the ones that appear above the
top of your photo, and along the left
side), it's because you have to make
your guides visible first. Press
Com-
mand-Shift- H (PC: Ctrl-Shift-H)
or just
choose
Show Guides
from the View
menu. Now when you use that shortcut,
you'll be toggling the rulers on/off.
▼
Adding Photos to Your
Printing Queue
Adding more photos to print couldn't be
easier—just go to the Filmstrip and Com-
mand-click (PC: Ctrl-click) on any photo
you want to add to your print queue, and
Lightroom instantly creates another page
for it in the queue. To remove a photo
from the print queue, it's just as easy: go
to the Filmstrip and Command-click (PC:
Ctrl-click) on any already selected photo
to deselect it (Lightroom removes the
page from your queue automatically, so
you don't print a blank sheet).
▼
Enabling 16-Bit Printing
If your inkjet printer was made in the last
few years, it probably supports 16-bit
printing, but to take advantage of it,
make sure you have the latest printer
driver (which can be downloaded for
free from your printer manufacturer's
website).
Note:
16-bit printing currently
only works for Mac users, and only those
using Mac OS X Leopard or higher.
▼
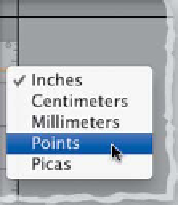
Changing Your Ruler Units
▼
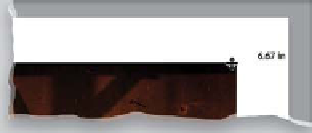
Precise Margins Way Quicker
Than Using the Margins Sliders
▼
Choosing How the Identity
Plate Prints
To change the unit of measure for your
rulers, just Right-click on either ruler, and
a pop-up menu of measurements (Inches,
Centimeters, Millimeters, Points, and
Picas) will appear, so you can choose
the one you'd like.
If you need to reposition your image on
the page, you can adjust the Margins or
Cell Size sliders. But if your guides are
visible, it's easier just to click-and-drag a
margin guide itself, because as soon as
you start dragging, the position of the
guide (in inches) appears above the top
of the guide, so it's easy to quickly set
two side or top and bottom margins to
the exact same amount.
There are two other options for how
the Identity Plate is used in multi-photo
layouts. If you choose Render on Every
Image, it puts your Identity Plate right
smack dab in the middle of each photo,
in each cell (so if you wanted to use your
logo as a watermark by lowering the
opacity of that Identity Plate, that would
work). If you choose Render Behind
Image, it prints on the background, as if
it was a paper watermark (scale it up so
it is slightly larger than your image).
▼
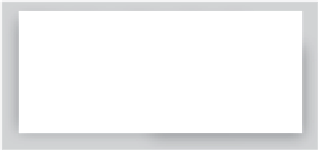
Changing the Preview Area
Background Color
▼
Sending Prints to a Lab?
You can change the color of the gray
canvas area that surrounds your printed
page. Just Right-click anywhere on that
gray background area and a pop-up
menu will appear where you can
choose different colors.
If you use Lightroom's ability to save a
page layout to JPEG, so you can send
your prints to a lab for final printing, then
here's a great tip: make a new template
that has your usual page size, layout, etc.,
but make sure you set your color profile
▼
Nudging the Identity Plate
In the Print module, you can move the
position of your Identity Plate graphic
(or text) by small increments by using
the
Arrow keys
on your keyboard.