Graphics Programs Reference
In-Depth Information
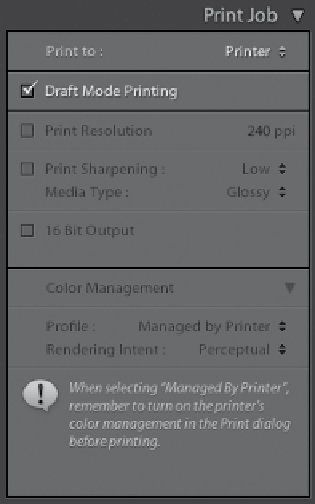
Step Three:
Since we've already started at the top,
we'll just kind of work our way down.
The next setting down in the panel is a
checkbox for Draft Mode Printing, and
when you turn this on, you're swapping
quality for speed. That's because rather
than rendering the full-resolution image,
it just prints the low-res JPEG preview
image that's embedded in the file, so the
print comes out of your printer faster
than a greased pig. I would only recom-
mend using this if you're printing multi-
photo contact sheets. In fact, I always
turn this on when printing contact sheets,
because for printing a page of small
thumbnail images, it works beautifully—
the small images look crisp and clear.
Notice, though, that when you turn Draft
Mode Printing on, all the other options
are grayed out. So, for contact sheets,
turn it on. Otherwise, leave this off.
Step Four:
Make sure the Draft Mode Printing check-
box is turned off, and now it's time to
choose the resolution of your image. If you
want to print at your file's native resolution,
then turn the Print Resolution checkbox
off. Otherwise, when you turn the check-
box on, the default resolution is 240 ppi
(fine for most color inkjet printing). I use
Epson printers, and I've found resolutions
that work well for them at various sizes.
For example, I use 360 ppi for letter-sized
or smaller prints, 240 ppi for 13x19" prints,
or just 180 ppi for a 16x20" or larger. (The
larger the print size, the lower the resolu-
tion you can get away with.) In this instance,
I'm printing to an Epson Stylus Pro 3880
on a 17x22" sheet, so I would highlight the
Print Resolution field and type in 180 (as
shown here), then press the Return (PC:
Enter) key.
Note:
If printing at 180 ppi freaks
you out, just leave it set to the default of
240 ppi, but at least try 180 ppi once on a
big print, and see if you can tell a difference.
Continued